AWS VPC
Here is best description in this Video about VPC and we are going through this step by step here
These are my written notes on the lesson, so this may be a bit difficult to dissect at parts, but I certainly recommend exploring the video further for more in depth lessons on the subject matter. I left “bookmark” links below each of the snapshots to encourage further exploration.
Virtual Private Cloud


The default VPC contains over 65,000 private IPs… so why not use it? If you instead create a custom VPC, it is more secure and you can customize (define your own IP address range, create your own public and private subnets, tighten down security settings).
“By default, instances you launch into a VPC can’t communicate with your own network.” So you can connect your VPC to your own data center using Hardware VPN Access. “So that you can effectively extend your data center into the cloud and create a hybrid environment”
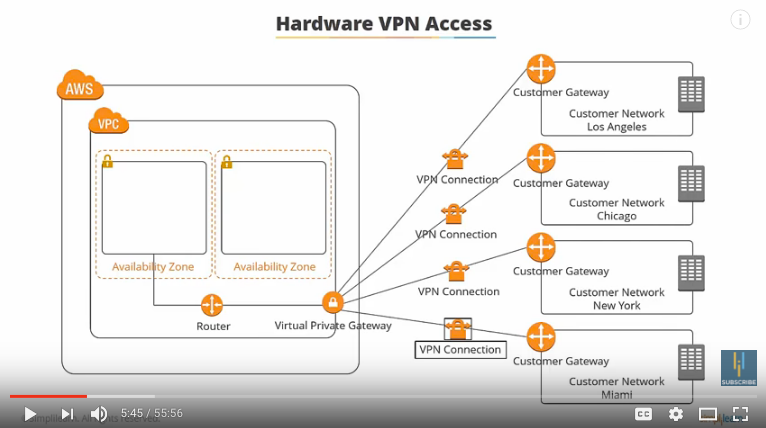
To do this, you need a Virtual Private Gateway. On the left side (labelled ‘virtual private gateway’) is the VPN concentrator on the Amazon side. Then on your side, you need a customer gateway, which is either a physical device or a software applicate that sits on your side of the VPN connection. A VPN Tunnel comes up when traffic is generated from your side of the connection.
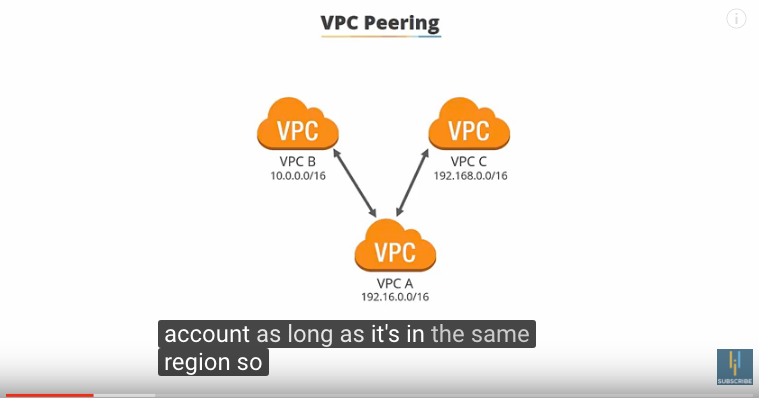
Can be between your VPCs or other VPCs. VPC A wouldn’t be able to communicate with VPC B or C without a peering connection. Transitive peering does not work, meaning that VPCs need to be directly peered in order to be connected.
Also, VPCs with overlapping CIDRS cannot be peered. These are fine because they have different domain ranges, but if they didn’t there would be a problem.
If you delete the default VPC, you have to contact AWS support to get it back again!
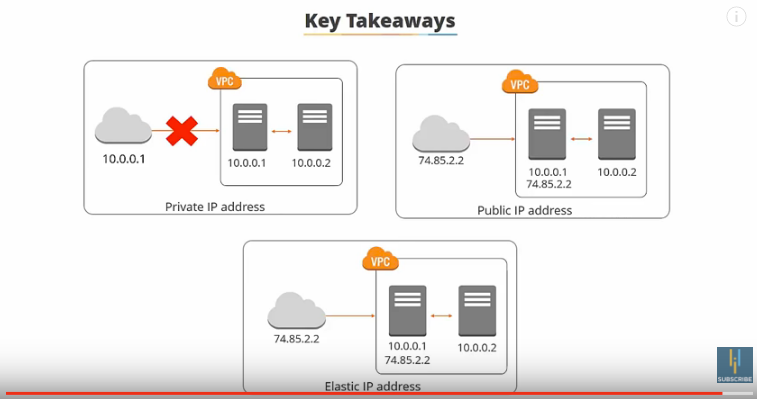
Private IP Addresses are IP Addresses not reachable over the internet. They are used for communications between instances in the same network.
“When you launch a new instance it’s given a private IP address and an internal DNS Hostname that resolves to the private IP address of the instance. But if you want to connect to this over the internet, it’s not going to work. So then you’d need a public IP address which is reachable from the internet. You can use public IP addresses for communication between your instances and the internet. Each instance that receives a public IP address is also given an external DNS hostname.
Public IP addresses are associated with your instances from the Amazon pool of public IP addresses. When you stop or terminate your instance, the public IP address is released, and a new one is associated when the instance starts. So if you want your instance to retain this public IP address, you need to use something called an Elastic IP Address.”
An elastic IP address is a static or persistent IP address that’s allocated to your account and can be associated to and from your instances as required.

Default Net Mask in 20 for Subnets. These preserve up to 4096 IP addresses per subnet. Subnets are always mapped to a single availability zone (see below)
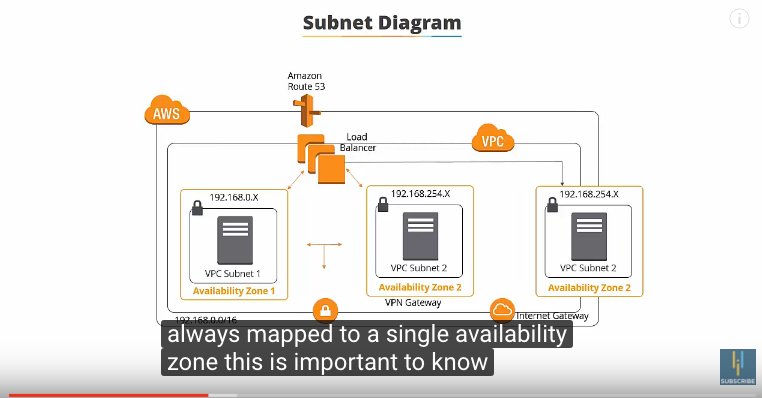
It is good to spread VPCs over availability zones for redundancy and failover purposes. You use Public Subnets for things that must be connected to the internet, such as web servers. Private Subnets either don’t need the internet, or are things you want to protect from the internet, such as database instances.


To attach your VPC to the internet, you need to attach an Internet Gateway, and you can only attach one internet gateway per VPC.
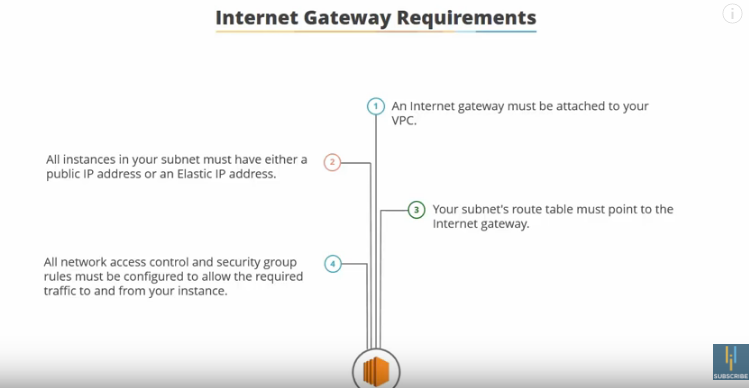
Can now see the VPC has internet attached:
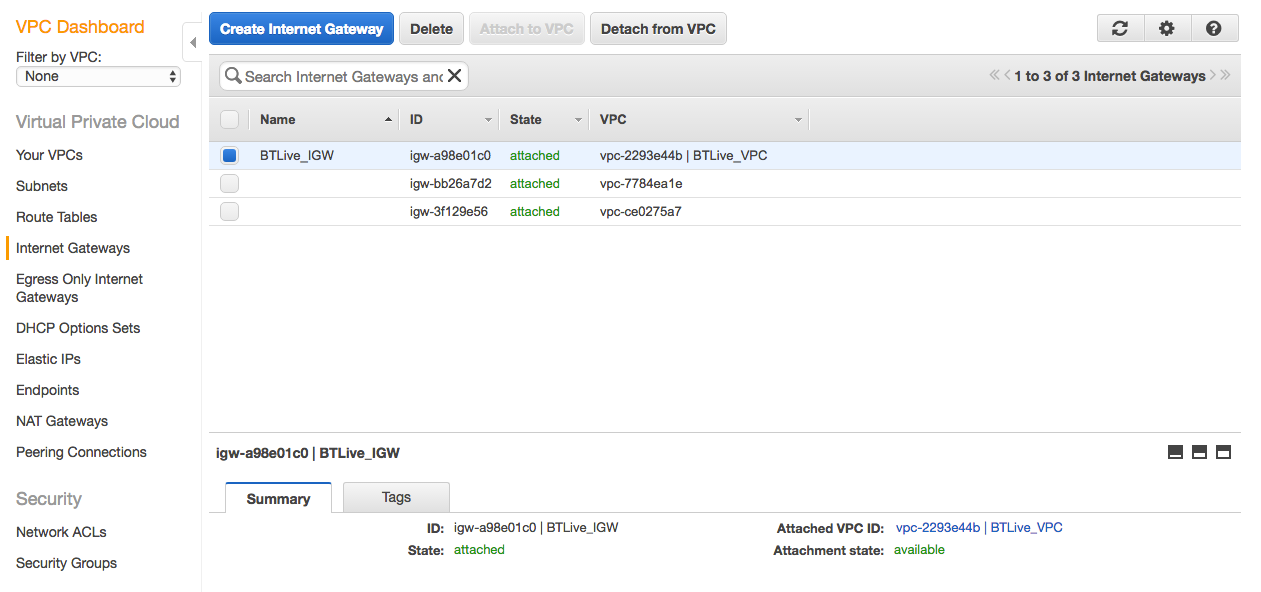
Before our instances can have access to the internet, we need to make sure that our subnet route tables point to the internet gateway.

Every VPC has a default route table. It’s good practice to create a new one to practice with customization.

Above, the main route table is for the locally connected private subnet, which is the default (not connected to the internet). Above, the custom route table is used for the public subnet, connected to the internet gateway, and therefore the internet.
This is where you edit/create a route table and connect it to an internet gateway:

Then, visit “subnet associations” and associate the Public subnet with the route table you just created.

NAT devices [network address translation devices] allow you to give a private subnet to the internet, without allowing the internet to access that subnet.
A NAT device forwards traffic from your private subnet to the internet, or other AWS services, and then sends the response back to the instances. When traffic goes to the internet, the source IP address of your instance is replaced with the NAT device and when the internet traffic comes back again, then that device translates the address to your instance’s private IP address.
A NAT Gateway is recommended by AWS because it is a provided service that gives more bandwidth than NAT Instances. Each NAT Gateway is created in a specific availability zone and is implemented with redundancy.
A NAT Instance is launched from a NAT AMI [Amazon Machine Image] and runs as an instance in your VPC, so it’s something else you have to look after. Whereas, in a NAT Gateway, a fully managed service, you can basically install it and forget about it.
NAT Gateway must be launched into a public subnet because it needs internet connectivity.
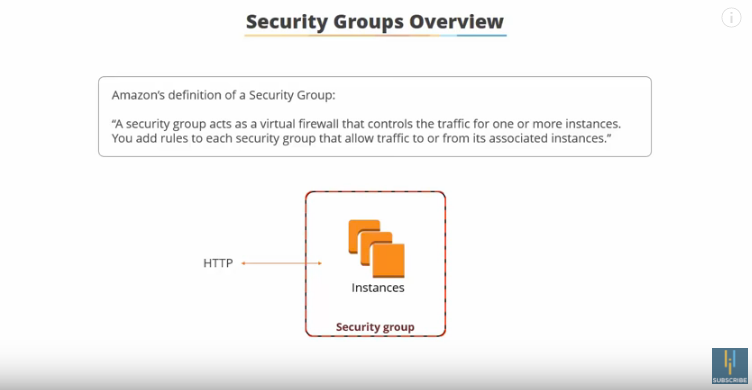
Our diagram with security groups:

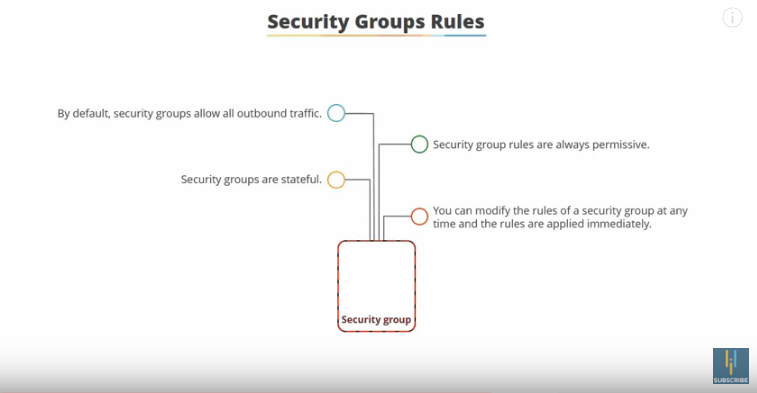
Now, for Network ACLs

Our diagram with Network ACLs:




As always, thank you for reading! If you’d like to connect, I’ll leave my information below. I thrive in my work only by meeting and learning from new people.
Last updated