> For the complete documentation index, see [llms.txt](https://tkssharma-devops.gitbook.io/devops-training/llms.txt). Markdown versions of documentation pages are available by appending `.md` to page URLs; this page is available as [Markdown](https://tkssharma-devops.gitbook.io/devops-training/devops-01-continuous-integration/continuous-integration-and-continuous-delivery/ci-cd-using-travis-github/static-site-build-s3.md).
# Static Site Build S3
This guide will show you how to automatically push your static site from GitHub onto S3 through a continuous integration workflow.
Why onto S3? S3 is a great solution for serverless web assets, such as a portfolio, blog, or [other static sites](https://www.reliam.com/static%20websites/2017/03/03/s3-static-websites.html). S3 is awesome, quite inexpensive and used in production to make some very large and scalable static web pages.
To accomplish our goal of having an S3 bucket with the latest version of our webpage, we will use Travis CI to build the site and deploy it.
#### AWS
To get started, login to your [AWS account](http://console.aws.amazon.com/) (or [create one](https://aws.amazon.com/)).**Note**: If you are logged in as root (the account you used to register for AWS) make sure that your security status has five green check marks!

If your account is not yet secure, activating MFA and deleting root keys should be your first priority. You might also want to check out:
* [Seven Steps to Secure Your AWS Root Account](https://securosis.com/blog/seven-steps-to-secure-your-aws-root-account)
* [IAM best practices: Lock away your root account](http://docs.aws.amazon.com/IAM/latest/UserGuide/best-practices.html#lock-away-credentials)
* [Root vs IAM account](http://docs.aws.amazon.com/general/latest/gr/root-vs-iam.html)
**AWS — S3**
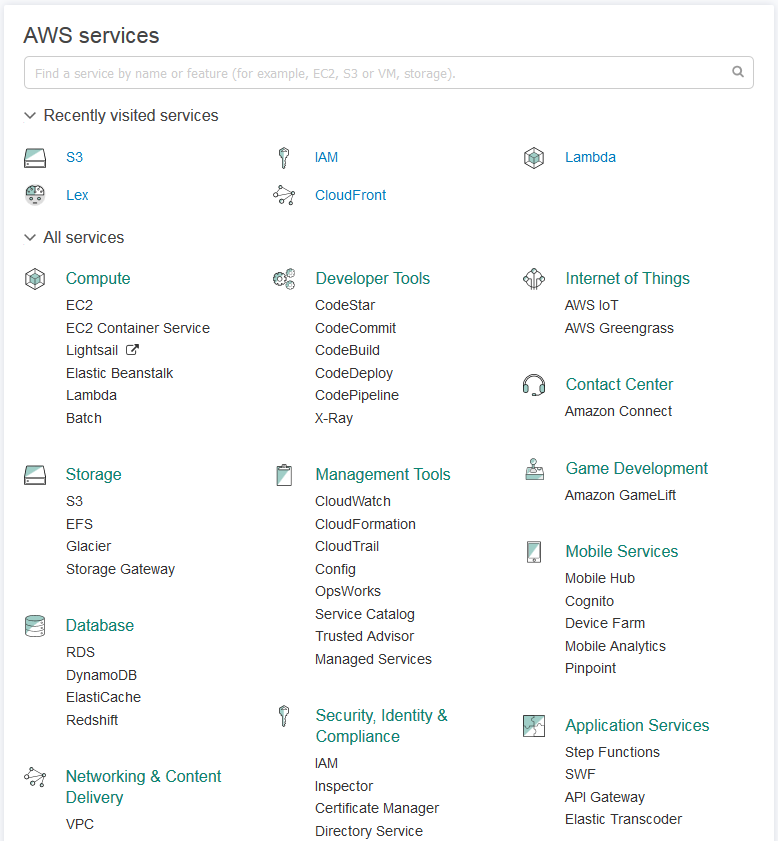
First we will create a new S3 bucket for holding and hosting our site.If you have used S3 before, it might be under your recently visited services, otherwise it will be under Storage. Alternative, you can go directly into the [s3 console](https://s3.console.aws.amazon.com/s3/home).
During the creation process picking a name for the S3 bucket can be a bit difficult, because bucket names have a global scope. This means that trying to use names like **test** will fail as they are taken by someone else.
Don’t forget that the buckets need to have [DNS compliant](http://docs.aws.amazon.com/AmazonS3/latest/dev/BucketRestrictions.html) names (Between 3 to 63 characters, cannot start or end with a period, be in IP address format etc…).
Once you have a bucket name and a region selected, just click the create button.We can skip the rest of the options and just create the bucket after this.

After the bucket is created, go into the bucket’s properties and enable **Static Web Hosting** with the **Use this bucket to host the website** option.
Hit save.Note: The default index and error documents will be called **index.html** and **error.html** respectively.

**AWS — IAM User**
Next, we will need to create a user that Travis CI can use to deploy our code into our new S3 bucket.
Go into IAM > users > add new user
Give it a descriptive name and make sure to check **Programmatic access.**
Skip the permission step for now and review and create your user. Make sure to save the **`access_key_id`** and **`secret_access_key`**. The easiest way is to download the **`credentials.csv`.**
Once the user is created, click on them. Under permissions, you should see“**add inline permission**”.
We will add the following json, but with the later two **Resource** having `your_bucket_name` replaced with the name of the newly created bucket.
```
{
"Version": "2012-10-17",
"Statement": [
{
"Effect": "Allow",
"Action": "s3:ListAllMyBuckets",
"Resource": "arn:aws:s3:::*"
},
{
"Effect": "Allow",
"Action": [
"s3:ListBucket",
"s3:GetBucketLocation"
],
"Resource": [
"arn:aws:s3:::your_bucket_name"
]
},
{
"Effect": "Allow",
"Action": [
"s3:PutObject",
"s3:GetObject",
"s3:GetObjectAcl",
"s3:DeleteObject",
"s3:PutObjectAcl"
],
"Resource": [
"arn:aws:s3:::your_bucket_name/*"
]
}
]
}
```
**AWS — Testing User Account**
Next we will test to see whether our new account and the S3 bucket play along together. For this, we will use the AWS CLI [(Download AWS CLI](http://docs.aws.amazon.com/cli/latest/userguide/installing.html)).
Open your favorite terminal and [configure aws cli](http://docs.aws.amazon.com/cli/latest/userguide/cli-chap-getting-started.html) with the newly created users credentials.
Example:
```
$ aws configure
AWS Access Key ID [None]: AKIAICCCCCCCCCCXAMPLE
AWS Secret Access Key [None]: wJalrCCCCCCCCBBBBBBBBMPLEKEY
Default region name [None]: us-west-2
Default output format [None]: json
```
Next let’s create a simple HTML hello world and call it index.html
```
Hello World
Hello World
```
We can use the `aws cp` function which works similarly to the linux [cp function](http://linuxcommand.org/lc3_man_pages/cp1.html).
The format of the `cp` command:
```
aws s3 cp [source] [destination]
```
Within the folder you saved `index.html`. Type the following command and replace **`[bucket_name]`** with your bucket name.
```
aws s3 cp index.html s3://[bucket_name]/index.html
```
Check if the file was moved into the bucket by logging into the [aws s3 console](https://console.aws.amazon.com/s3/home).
If the file is in there, our new account has enough permissions to at least push files into the S3 bucket. Next, take a look at the new file’s permission, give **everyone** read object permissions.
After which, if you go back into the file overview tab and click on its link, we can see how our page will be displayed if someone has the link.
### GitHub and Travis CI
**Introduction to Travis CI**
Travis CI, along with [several](https://strongloop.com/strongblog/node-js-travis-circle-codeship-compare/) [others,](https://www.linux.com/blog/continuous-integration-circleci-vs-travis-ci-vs-jenkins) is a provisioned, cloud based virtual machine that provides users with continuous integration (CI) and continuous deployment (CD). Stack Overflow has a[ good post](https://stackoverflow.com/a/32422909/1771644) on why to use Travis CI. [Explained in several places\]](https://hackernoon.com/continuous-integration-circleci-vs-travis-ci-vs-jenkins-41a1c2bd95f5)
**Github Setup**
* Either log into [GitHub](https://github.com/) and open or create your static sites repository.- (Optional) If you are creating a new one we can add a license file and a basic README now.
* Git clone the repo onto your machine.
* Once your repository is created login into [TravisCI](https://travis-ci.org/) and make sure the repository is toggled to on.
We are just doing step 1. Image from [TravisCI](https://travis-ci.com/)

**Travis — Yaml Config**
Create an empty `.travis.yml` file within your repo folder.
According to the [Travis docs](https://docs.travis-ci.com/user/deployment/s3/), the bare minimal configuration we need to add to our `.travis.yml` to deploy to S3 is:
```
deploy:
provider: s3
access_key_id: "YOUR AWS ACCESS KEY"
secret_access_key: "YOUR AWS SECRET KEY"
bucket: "S3 Bucket"
```
We replace the access key and secret key with the ones we got from our newly created user’s `credentials.csv` file and the bucket should match our S3 created bucket name.
**Before we commit this** note that you should never post your secret access key anywhere publicly accessible. So, for our minimal configuration we will need to first encrypt the **secret\_access\_key** before we can create our initial commit of the config file. **(Important**: If you commit the unencrypted access key, you will need to go into AWS — IAM, click on the user used for travisCI and under **security credentials** delete the old access key and generate a new one.)
* First download and install [Travis CLI](https://github.com/travis-ci/travis.rb) (this will require installation of ruby or possibly an [upgrade](https://gist.github.com/luislavena/f064211759ee0f806c88))
* Next open your terminal and cd into the repository containing the `.travis.yml`
To encrypt the file, [according to documentation](https://docs.travis-ci.com/user/deployment/s3/) is as follow:
```
travis encrypt --add deploy.secret_access_key
```
But, what you really need to do is:
```
travis encrypt --add deploy.secret_access_key secret_access_key=”YOUR AWS SECRET KEY”
```
Next, if we look back at our file it will look something like this:
```
deploy:
provider: s3
access_key_id: "YOUR AWS ACCESS KEY"
secret_access_key:
secure: "w/DlbHt1+IAMENCRYPTED"
bucket: "YOUR BUCKET"
```
Once we have successfully encrypted our secret key we can commit and push
* `.travis.yml`
* `index.html` (The same hello World One)
Next we will let Travis build, run and deploy our code, but we will get the following error:
```
The command "rake" exited with 1.
```
And if you look at the logs you will probably seem something like this:
```
$ rake
rake aborted!
No Rakefile found (looking for: rakefile, Rakefile, rakefile.rb, Rakefile.rb)
/home/travis/.rvm/gems/ruby-1.9.3-p551/bin/ruby_executable_hooks:15:in `eval'
/home/travis/.rvm/gems/ruby-1.9.3-p551/bin/ruby_executable_hooks:15:in `'
(See full trace by running task with --trace)
```
That’s caused because Travis defaulted to running your code as a ruby project and it couldn’t find or run your default [rake file](https://github.com/ruby/rake).
### **Travis — Node.js Project**
We will convert the project into [Node.js](https://docs.travis-ci.com/user/languages/javascript-with-nodejs/), since we will probably want to use Bootstrap with sass, a Sass compiler, and maybe a css optimizer.
We will [specify the latest version of node](https://docs.travis-ci.com/user/languages/javascript-with-nodejs/#Specifying-Node.js-versions) to keep our dependencies working. This will also keep us from getting errors like:
```
Node.js version v0.10.48 does not meet requirement for yarn. Please use Node.js 4 or later.
```
So we will add to our config:
```
language: node_js
node_js:
- node
```
Unless we make a `package.json` file we will get the following:
```
$ make test
make: *** No rule to make target `test'. Stop.
The command "make test" exited with 2.
```
**Project — package.json**
If you have [node.js](https://nodejs.org/en/) installed on your machine, open your terminal and cd into your local repo and type the following:
```
npm init
```
Next, a prompt will ask you to enter some information
* name
* version (Here you can put 0.0.0 or 0.0.1)
* description (optional)
* main (optional)
* repository url (your github repo url)
* author
* license (MIT or default should be fine)
After you are done, a `package.json` will be created that will look something like this:
```
{
"name": "your-package",
"version": "0.0.1",
"description": "My very first package",
"main": "index.js",
"scripts": {
"test": "echo \"Error: no test specified\" && exit 1"
},
"repository": {
"type": "git",
"url": "git+https://github.com/user/project_name.git"
},
"author": "Michal Frystacky",
"license": "MIT"
}
```
If we commit now, we will still get another error.
```
> echo "Error: no test specified" && exit 1
Error: no test specified
npm ERR! Test failed. See above for more details.
```
So, to finally get our first working copy we will need to change our `test`under `scripts` to something like:
```
"test": "exit 0"
```
The first working `package.json` will look something like this:
```
{
"name": "your-package",
"version": "0.0.1",
"description": "My very first package",
"main": "index.js",
"scripts": {
"test": "echo \"No tests\" && exit 0"
},
"repository": {
"type": "git",
"url": "git+https://github.com/user/project_name.git"
},
"author": "Michal Frystacky",
"license": "MIT"
}
```
Now, if we commit the
* `package.json`
and if you haven’t already, commit the
* `.travis.yml`
* `index.html`
We will get our first commit and deploy into the S3 bucket. The error that you may encounter here is:
```
The request signature we calculated does not match the signature you provided. Check your key and signing method. (Aws::S3::Errors::SignatureDoesNotMatch)
```
That’s Travis telling you that you entered your `programmatic access` keys (the `access_key_id` and/or `secret_access_key` ) incorrectly. In my case, I encrypted the `secret_access_key` incorrectly and thus I had to redo it correctly to deploy into the S3 bucket.
**Travis — Deploy and set permission**
Deploying files to S3 automatically is great, but if we had to change the permission for every file manually, so that its publicly accessible, there would be almost no point to everything we have done.
With the following [S3 ACL option](https://docs.travis-ci.com/user/deployment/s3/#S3-ACL-via-option) we can have Travis set the correct file permissions.
```
acl: public_read
```
Our config file should now look like this:
```
language: node_js
node_js:
- node
deploy:
provider: s3
access_key_id: "YOUR AWS ACCESS KEY"
secret_access_key:
secure: "w/DlbHt1+IAMENCRYPTED"
bucket: "YOUR BUCKET"
acl: public_read
```
---
# Agent Instructions
This documentation is published with GitBook. GitBook is the documentation platform designed so that both humans and AI agents can read, navigate, and reason over technical content effectively. Learn more at gitbook.com.
## Querying This Documentation
If you need additional information that is not directly available in this page, you can query the documentation dynamically by asking a question.
Perform an HTTP GET request on the current page URL with the `ask` query parameter, and the optional `goal` query parameter:
```
GET https://tkssharma-devops.gitbook.io/devops-training/devops-01-continuous-integration/continuous-integration-and-continuous-delivery/ci-cd-using-travis-github/static-site-build-s3.md?ask=&goal=
```
`ask` is the immediate question: it should be specific, self-contained, and written in natural language.
`goal` is optional and describes the broader end goal you are ultimately trying to accomplish on behalf of the user. GitBook uses it to tailor the answer towards what is most useful for that goal.
The response will contain a direct answer to the question and relevant excerpts and sources from the documentation.
Use this mechanism when the answer is not explicitly present in the current page, you need clarification or additional context, or you want to retrieve related documentation sections.