> For the complete documentation index, see [llms.txt](https://tkssharma-devops.gitbook.io/devops-training/llms.txt). Markdown versions of documentation pages are available by appending `.md` to page URLs; this page is available as [Markdown](https://tkssharma-devops.gitbook.io/devops-training/devops-01-continuous-integration/continuous-integration-and-continuous-delivery/ci-cd-using-travis-github/travis-using-code-deploy-ec2/travis-ci-with-code-deploy.md).
# Travis CI with Code Deploy
## Deployment to EC2 Instance using Code Deploy

## Comprehensive AWS EC2 Deployment with TravisCI Guide
> **High Level Work Flow**:
```
> Merge Pull Request on master(on Github)
> Travis Builds your projects automatically/run tests
> Travis Uploads your zipped project up to AWS S3
> Travis Then Tells AWS Code Deploy to deploy to your AWS EC2 Instance
```
What all we need for this is below steps --
> 1\. Pre - Setup\
> 2\. Policy For Server\
> 3\. Policy For Travis CI\
> 4\. Creating Travis User in IAM\
> 5\. Role for EC2 Instance\
> 6\. Role for Code Deploy Application\
> 7\. Create EC2 Instance\
> 8\. Create EC2 Tag\
> 9\. Create S3 Bucket\
> 10\. Setup Code Deploy\
> 11\. Project Setup\
> 12\. Setting Up Travis User Credentials on Travis\
> 13\. Code Deploy Agent Setup
#### **1. Pre - Setup**
* Create a Travis CI account and link to your github
[**Travis CI - Test and Deploy Your Code with Confidence**
](https://travis-ci.org/)On the Travis website will be these instructions as well!
* Create an AWS account
[**Amazon Web Services (AWS) - Cloud Computing Services**\
\&#xNAN;*Amazon Web Services offers reliable, scalable, and inexpensive cloud computing services. Free to join, pay only for…*aws.amazon.com](https://aws.amazon.com/)
There is an option to use their free tier for 12 months at this time.
The fun begins when you log into the AWS management console. You’ll see all these things and it can seem overwhelming, and it is, but we are only going to focus on the four things that will get your project deployed.
> EC2 — service instance
> IAM — Set all permissions here
> Code Deploy — will deploy S3 bucket to our EC2 instance
> S3 — container for our revision\* aka zipped up version of our app
* Once you have created your account log into the AWS Management Console

* In the search box type in IAM to find the service
* All our users/roles/policies are created here!
#### 2. Policy For Server

* Select Policies Tab
* Click on the big blue button that says create policy
* Select create your own policy
* In the policy Name box type:
**CodeDeployDemo-EC2-Permissions**
```
{
"Version": "2012-10-17",
"Statement": [
{
"Action": [
"s3:Get*",
"s3:List*"
],
"Effect": "Allow",
"Resource": "*"
}
]
}
```
In the Policy Document Box Paste the Above and create the policy. What this means is this policy is going to give your EC2 Instance permission to get any data from the s3 service.(This will be attached to a Role, don’t worry about this too much for now)
#### 3. Policy For Travis CI
**Note**: This will require two policies, one to upload to S3 and one tell CodeDeploy to deploy to EC2

* Select Policies Tab
* Click on the big blue button that says create policy
* Select create your own policy
* In the policy Name box type:
**Travis-Deploy-To-S3**
```
{
"Version": "2012-10-17",
"Statement": [
{
"Effect": "Allow",
"Action": [
"s3:PutObject"
],
"Resource": [
"*"
]
}
]
}
```
In the Policy Document Box paste the above. This policy allows Travis to upload the zipped project to AWS S3 Service.
> **Second Policy:**

* Select Policies Tab
* Click on the big blue button that says create policy
* Select create your own policy
* In the policy Name box type:
**Travis-Code-Deploy-Policy**
This one is tricky; pay attention to the bold:
```
{
"Version": "2012-10-17",
"Statement": [
{
"Effect": "Allow",
"Action": [
"codedeploy:RegisterApplicationRevision",
"codedeploy:GetApplicationRevision"
],
"Resource": [
"arn:aws:codedeploy:ServerRegionHERE:AccIdHERE:application:NameOfTheCodeDeployApplicationNameHERE"
]
},
{
"Effect": "Allow",
"Action": [
"codedeploy:CreateDeployment",
"codedeploy:GetDeployment"
],
"Resource": [
"*"
]
},
{
"Effect": "Allow",
"Action": [
"codedeploy:GetDeploymentConfig"
],
"Resource": [
"arn:aws:codedeploy:ServerRegionHERE:AccIdHERE:deploymentconfig:CodeDeployDefault.OneAtATime",
"arn:aws:codedeploy:ServerRegionHERE:AccIdHERE:deploymentconfig:CodeDeployDefault.HalfAtATime",
"arn:aws:codedeploy:ServerRegionHERE:AccIdHERE:deploymentconfig:CodeDeployDefault.AllAtOnce"
]
}
]
}
```
The bold words is what you will have to replace: The AccId can be found on the main dashboard of IAM replace Acc Id here with the numbers highlighted up thereUse the region you will be hosting your EC2 Instance too. If you are unsure you can use us-west-1


For the the last bold word **NameOfTheCodeDeployApplicationNameHERE**
Name it whatever your want but make sure you are consistent, you can name it your project, organization or something cool if you like. **Keep note of this name** because you will need it when you create your code deploy application.
#### 4. Creating Travis User in IAM
Now that we have created our policies we have to make the Travis user
* Click on Create New Users
* Type in Travis for the name, click next. Don’t uncheck anything.
* When you have created the user you will be prompted to download the credentials. Save this in a secure location because you will not be able to retrieve the secret key later

* After creating the user, click on the name to get to the summary page
* Click Attach Policy
* Attach the policies we just created to the Travis User
**Travis-Code-Deploy-Policy**
**Travis-Deploy-To-S3**
#### 5. Role for EC2 Instance
We will create our EC2 Role that we will attach to our instance
* In the IAM console click on Roles
* Click on Create New Role
* In the Role name type:
**CodeDeploy\_EC2\_DEPLOY\_INSTANCE**This is going on our EC2 Instance so we must select that! Search for the policy we created earlier, check the box, and click next step.


Click create role and we are done making the server role!
#### 6. Role for Code Deploy Application
Another Role ?!? this one is easy

* In the IAM console click on Roles
* Click on Create New Role
* In the Role name type:
**CodeDeployServiceRole**


* Select Code Deploy
* You will be brought to this page
* Select the highlighted. Go to the next page and create the role!
#### 7. Create EC2 Instance
I came across this awesome blog on how to setup an EC2 Instance, linked Below
**IMPORTANT NOTE**: on step three of the configuration set your IAM role!Make sure you set the IAM role to the one we worked so hard to create

**Point of Frustration:** If you have already deployed your instance without selecting this role. You will have to relaunch/create a new instance and select a role because you cannot attach it to an already created instance
[http://..www.iamhoon.com/blog/2016/9/17/amazon-web-service-101-deploying-a-mean-app-to-amazon-ec2](http://www.iamhoon.com/blog/2016/9/17/amazon-web-service-101-deploying-a-mean-app-to-amazon-ec2)
#### 8. Create EC2 Tag
We will need to create server tag that code deploy can reference

* Go to your EC2 Dashboard and click on the highlighted to go to your EC2 Instance Dash

* On your Instance Right click and Select Add/Edit Tags

* The key and value here is what you want it to be. So give it any key and value and remember this tag.
#### 9. Create S3 Bucket

* At the top of the page click services, hover over All AWS services

* click on that icon!

* Give your bucket a name, it can be anything, just keep note of the name you use.
For convenience, choose the same region you used for EC2 instance
#### 10. Setup Code Deploy

* Head on over to CodeDeploy and click Create New Application
Deployment Group name is your preference, just remember what it is

* Remember the application name we set earlier in the travis code deploy policy? it goes here
ApplicationName: **NameOfTheCodeDeployApplicationNameHERE**Clicking on the boxes will lead to a drop down to select the tag you made

* Remember the EC2 tag we created on our instance earlier? Select the key and value

* This is fine the way it is unless you want to change it something else

* Look for the Code Deploy Service Role we made earlier
And that’s it for the Amazon Setup!
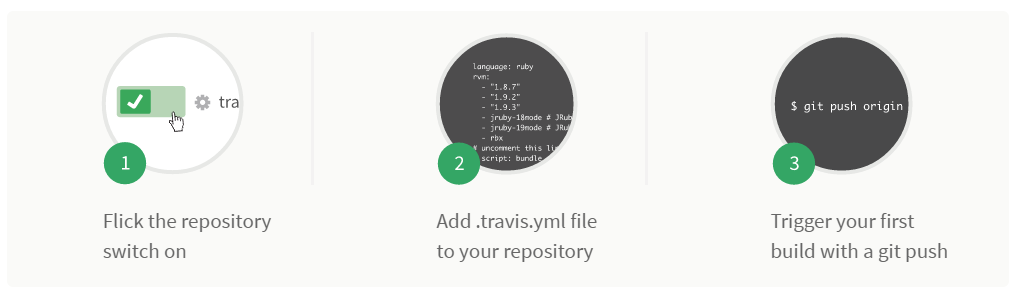
#### 11. Project Setup
We are going to need two files in our project for this to work correctly
**.travis.yml**
here is a sample .travis.yml for a mongodb/node backend, cater these to your own project
```
language: node_js
node_js:
- '6'
services:
- mongodb
cache:
directories:
- node_modules
deploy:
- provider: s3
access_key_id: $AWS_ACCESS_KEY
secret_access_key: $AWS_SECRET_KEY
local_dir: dpl_cd_upload
skip_cleanup: true
on: &2
repo: organization/reponameHERE
bucket: yourBucketNameHERE
region: bucketRegionHERE
- provider: codedeploy
access_key_id: $AWS_ACCESS_KEY
secret_access_key: $AWS_SECRET_KEY
bucket: yourBucketNameHERE
key: latest.zip
bundle_type: zip
application: NameOfTheCodeDeployApplicationNameHERE
deployment_group: CodeDeployDeploymentGroupNameHERE
region: serverRegionHERE
on: *2
script:
- zip -r latest *
- mkdir -p dpl_cd_upload
- mv latest.zip dpl_cd_upload/latest.zip
```
Let me go into detail about how this yml works**$AWS\_ACCESS\_KEY** and **$AWS\_SECRET\_KEY** are the TRAVIS IAM keys that we saved when we created the user. **DO NOT PUT YOUR ACTUAL KEYS HERE.**

* **cache** can speed up build time on Travis by not having to npm every time.
* **deploy** script runs only when a pull request a merged.
* **S3** Grab the files from this directory. When this repo is merges a PR, deploy to my S3 bucket in this region
* **Code Deploy** goes to the bucket and grabs the file called latest.zip and pushes that to the EC2 Instance
* **Script** will run during Travis builds and what it is doing is zipping our entire project into a file called latest.
* make a file called dpl\_cd\_upload
* move our latest.zip to the folder we just created
**appspec.yml**
```
version: 0.0
os: linux
files:
- source: ./
destination: /home/ubuntu/SomeNameHERE
```
Basically where you want your project to be placed on your EC2 Instance
#### 12. Setting Up Travis User Credentials on Travis
```
access_key_id: $AWS_ACCESS_KEY
secret_access_key: $AWS_SECRET_KEY
```
* We need to get our keys to travis somehow to do this we go to the Travis and go to the settings for this project
\*It is important that you do not display these keys in your build log. So leave the Display value in build log off.

* Remember the file we downloaded that has our Travis user credentials? add them as environmental variables here.
#### 13. Code Deploy Agent Setup
This is the last piece of the puzzle. You must have Code Deploy Running on your EC2 Instance. Amazon explains this the best.[**Install or Reinstall the AWS CodeDeploy Agent - AWS CodeDeploy**\
\&#xNAN;*Learn how to install or reinstall the AWS CodeDeploy agent.*docs.aws.amazon.com](http://docs.aws.amazon.com/codedeploy/latest/userguide/how-to-run-agent-install.html)
for the lazy(and using the Ubuntu server):
```
sudo apt-get update
sudo apt-get install python-pip
sudo apt-get install ruby2.0
sudo apt-get install wget
cd /home/ubuntu
wget https://bucket-name.s3.amazonaws.com/latest/install
chmod +x ./install
sudo ./install auto
bucket-name represents one of the following:
aws-codedeploy-us-east-1 for instances in the US East (N. Virginia) region
aws-codedeploy-us-west-1 for instances in the US West (N. California) region
aws-codedeploy-us-west-2 for instances in the US West (Oregon) region
aws-codedeploy-ap-south-1 for instances in the Asia Pacific (Mumbai) region
aws-codedeploy-ap-northeast-2 for instances in the Asia Pacific (Seoul) region
aws-codedeploy-ap-southeast-1 for instances in the Asia Pacific (Singapore) region
aws-codedeploy-ap-southeast-2 for instances in the Asia Pacific (Sydney) region
aws-codedeploy-ap-northeast-1 for instances in the Asia Pacific (Tokyo) region
aws-codedeploy-eu-central-1 for instances in the EU (Frankfurt) region
aws-codedeploy-eu-west-1 for instances in the EU (Ireland) region
aws-codedeploy-sa-east-1 for instances in the South America (São Paulo) region
to check if code deploy is running run this command:
sudo service codedeploy-agent status
```
#### Done!
These steps should get your project deployed AWS using Travis CI.
I will link the reference material that I used down here. In case you wanted to take a look at. (I’m sure you will)
This link here is the full comprehensive AWS bible
[**Getting Started with AWS CodeDeploy - AWS CodeDeploy**\
\&#xNAN;*Learn about the steps you must perform before you can use AWS CodeDeploy.*docs.aws.amazon.com](http://docs.aws.amazon.com/codedeploy/latest/userguide/getting-started-setup.html)
Travis CI code deploy instructions:[**AWS CodeDeploy - Travis CI**\
\&#xNAN;*Edit description*docs.travis-ci.com](https://docs.travis-ci.com/user/deployment/codedeploy/)
