Docker
Docker is a tool designed to make it easier to create, deploy, and run applications by using containers. Containers allow a developer to package up an application with all of the parts it needs, such as libraries and other dependencies, and ship it all out as one package. By doing so, thanks to the container, the developer can rest assured that the application will run on any other Linux machine regardless of any customized settings that machine might have that could differ from the machine used for writing and testing the code.
In a way, Docker is a bit like a virtual machine. But unlike a virtual machine, rather than creating a whole virtual operating system, Docker allows applications to use the same Linux kernel as the system that they're running on and only requires applications be shipped with things not already running on the host computer. This gives a significant performance boost and reduces the size of the application.
And importantly, Docker is open source. This means that anyone can contribute to Docker and extend it to meet their own needs if they need additional features that aren't available out of the box.
Who is Docker for?
Docker is a tool that is designed to benefit both developers and system administrators, making it a part of many DevOps (developers + operations) toolchains. For developers, it means that they can focus on writing code without worrying about the system that it will ultimately be running on. It also allows them to get a head start by using one of thousands of programs already designed to run in a Docker container as a part of their application. For operations staff, Docker gives flexibility and potentially reduces the number of systems needed because of its small footprint and lower overhead.
Docker is a platform for developers and sysadmins to develop, deploy, and run applications with containers. This is often described as containerization. Putting applications into containers leads to several advantages:
Docker containers are always portable. This means that you can build containers locally and deploy containers to any docker environment (other computers, servers, cloud, etc …)
Containers are lightweight because containers are sharing the host kernel (the host operating system) but can also handle the most complex applications
Containers are stackable, services can be stacked vertically and on-the-fly.
Containers vs. Virtual Machines
When talking about containerization it is very often compared to virtual machines. Let’s take a look at the following image to see the main difference:

The Docker container platform is always running on top of the host operating system. Containers are containing the binaries, libraries, and the application itself. Containers do not contain a guest operating system which ensures that containers are lightweight.
In contrast virtual machines are running on a hypervisor (responsible for running virtual machines) and include it’s own guest operating system. This increased the size of the virtual machines significantly, makes setting up virtual machines more complex and requires more resources to run each virtual machine.
Concept
This tutorial is about Docker and getting started with this popular container platform. Before actually starting to apply Docker in practice let us first clarify some of the most important concepts and terminologies.
Images
A Docker image is containing everything needed to run an application as a container. This includes:
code
runtime
libraries
environment variables
configuration files
The image can then be deployed to any Docker environment and executable as a container.
Containers
A Docker container is a runtime instance of an image. From one image you can create multiple containers (all running the sample application) on multiple Docker platform.
A container runs as a discrete process on the host machine. Because the container runs without the need to boot up a guest operating system it is lightweight and limits the resources (e.g. memory) which are needed to let it run.
Installation
First of all you need to make sure that Docker is installed on your system. For the following tutorial we’ll assume that the Docker Community Edition (CE) is installed. This edition is ideal for developers looking to get started with Docker and experimenting with container-based apps — so this is the perfect choice for our use case.
Docker CE is available for all major platforms including MacOS, Windows and Linux. The specifc steps needed to install Docker CE on your system can be found at https://docs.docker.com/install/.
For the following tutorial I’ll use Docker Desktop for Mac. The detailed installation instructions for this version can be found at https://docs.docker.com/docker-for-mac/install/.
Furthermore you should make sure to create a free account at https://hub.docker.com, so that you can use this account to sign in in the Docker Desktop application.
Finally you should be sure that the Docker Desktop application is started.
Once Docker is installed and running on your system we’re able to start by entering the following command on the terminal:
$ docker
This command will output a list with all options available for the dockercommand together with a short description. As output you should be able to see something similar to the following:
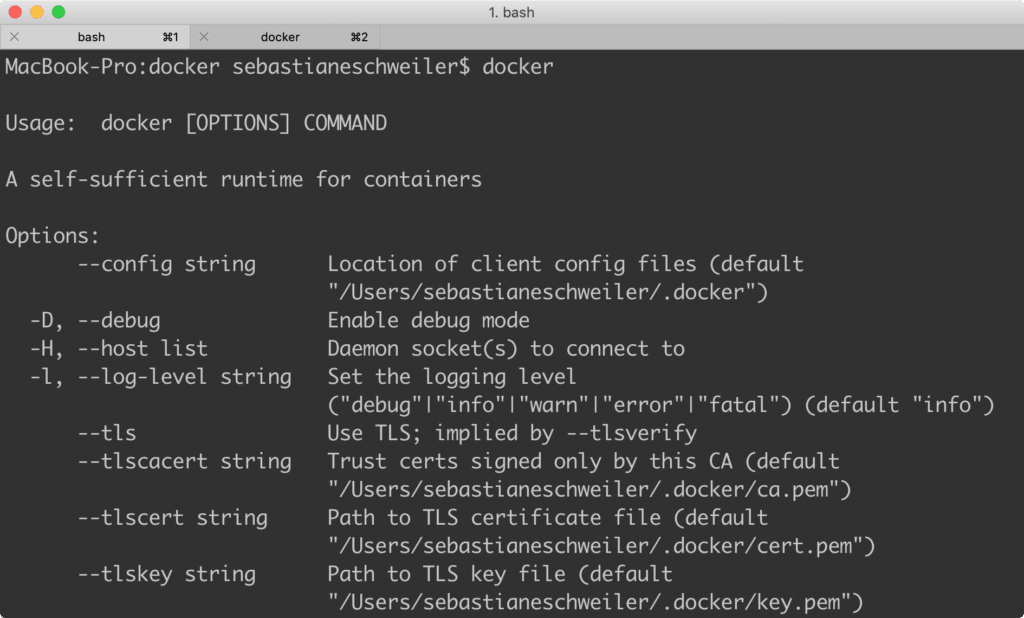
Next, use the following command to check for the installed Docker version:
$ docker version
The output gives you detailed information about the installed version of Docker:
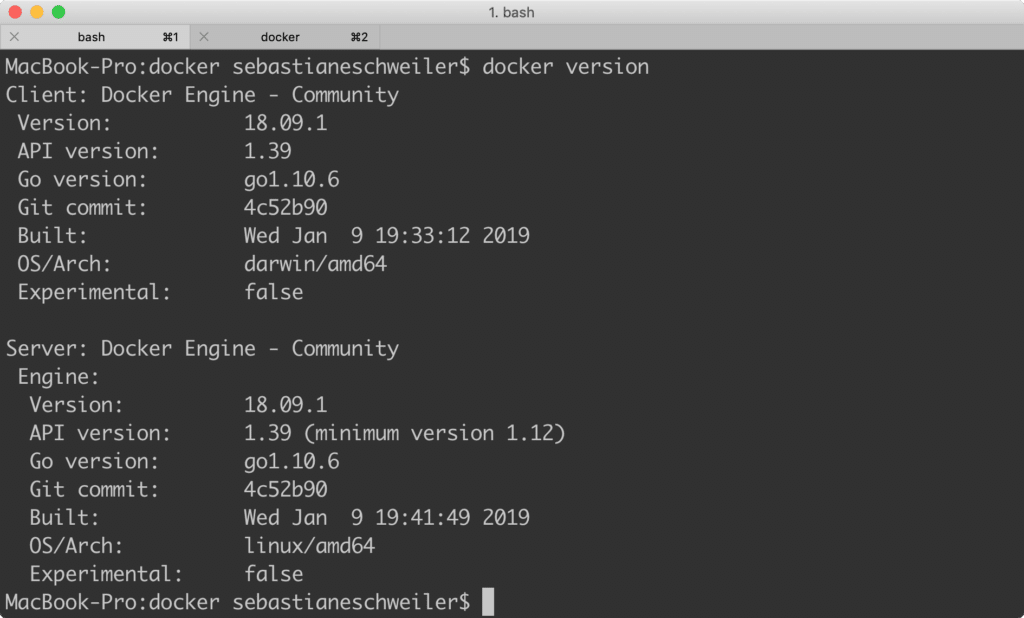
Selecting An Image
Now that Docker is up and running we’re ready to select an image so that we’re able to run our first docker container. To select from the list of already existing Docker images go to hub.docker.com:

Make sure that you’re logged in with your Docker Hub account and then use the search field to enter a search term which is matching the name of the application for which you’d like to find an existing Docker image.
Let’s say that we’d first like to run a Nginx web server. Type in the search term “nginx”. A result list will be presented:

The first result is the official Nginx image named nginx, so this is exactly what we’re looking for. Click on the image to by able to see the details page:
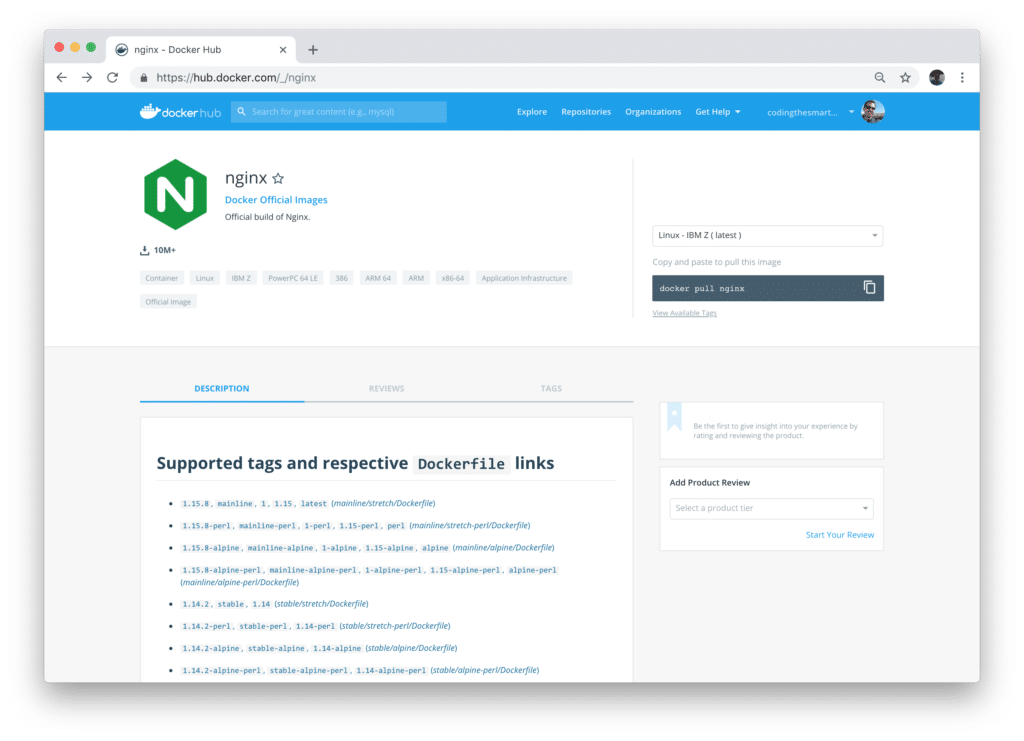
On the details page you can find an overview of the versions of this image and find links to the corresponding Dockerfiles.
A Dockerfile is a text document that contains all the commands you would normally execute manually in order to build a Docker image. Docker can build images automatically by reading the instructions from a Dockerfile.
Later we’ll go through the process of writing an Dockerfile from scratch.
Working With Images & Containers
In the last step we’ve used Docker Hub to search for docker images. Let’s run the nginx image by using the following command:
$ docker run -it -p 80:80 nginx
The docker run command lets you run any Docker image as an container. In this example we're using the following options in addition:
-it: executes the container in interactive mode (not in the background).-p 80:80: by using the -p option we're connecting the internal port 80 of the container the the external port 80. Because the Nginx server by default is running on port 80 we're then able to send HTTP request to the server from our local machine by opening up URL http://localhost:80. It's also possible to connect an internal port to any other external port, e.g. connecting internal port 80 to external port 8080 (-p 8080:80). In this case we need to access http://localhost:8080.
The name of the Docker image we’d like to use for starting up the container needs to be supplied as well, in out case nginx.
The response which is displayed in the browser when accessing the container by URL http://localhost:80 in the browser should like what you can see in the following screenshot:
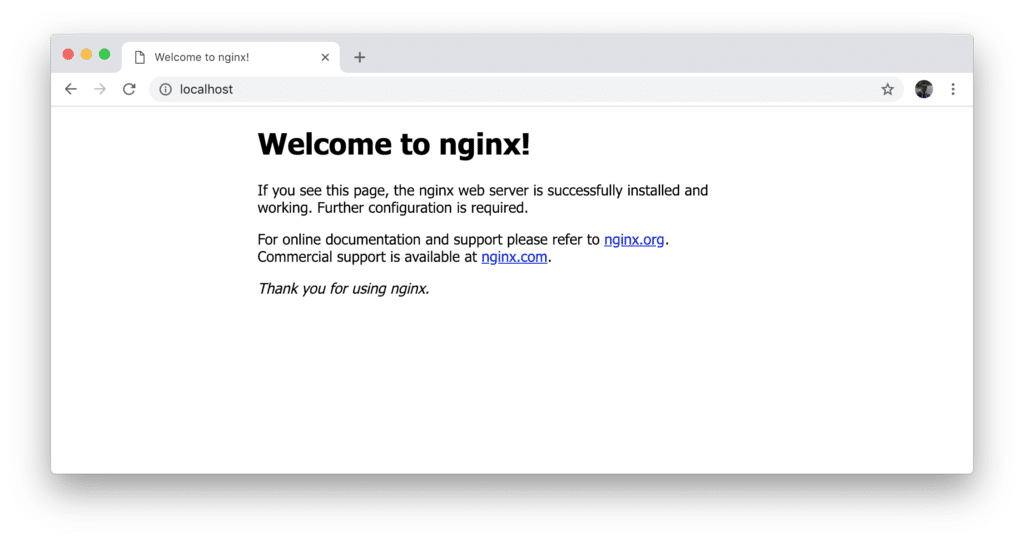
Because we’re running the container in interactive mode you should be able to see the log output of the incoming HTTP GET request on the command line:

Next, on a second terminal instance, we’re able to check for available containers by typing in the following command:
$ docker ps
The output will show you one result:

Here you can see that the container based on the nginx image is now running and is identified by a unique ID.
A container can be deleted by using the following command:
$ docker rm [CONTAINER_ID]
However, if we try to delete our Nginx container Docker is telling us that it’s not possible to delete a running running. Because we’re still running the container in interactive mode it’s easy to stop the container by just pressing CTRL+C in the terminal instance in which the container has been started. Now it is possible to delete the container by using the docker rm command.
Maybe you’ve noticed that the image for our container (nginx) was downloaded to our system when the container was started. Having deleted the container now the nginx image should still be available on our system. You can check this by using the following command:
$ docker images
And you’ll see from the result that the nginx image is available on the system:

Deleting an image from the system is done by using the following command:
$ docker images rm [IMAGE_ID]
If you only want to download an image from Docker Hub to the system (without running an container) you can also use the docker pullcommand:
$ docker pull nginx
Because the image is then available on your system creating containers based on that image is faster because the image file needs not to be downloaded first.
Running Containers In Detached Mode
So far, we’ve started our container in interactive mode. Containers can also be started in detached mode which means that those containers are running in the background (in not blocking the terminal instance). To start a container in detached mode we need to use the command line option -dinstead of option -it as you can see in the following:
$ docker run -d -p 80:80 nginx
Again, you’re able to check if the container is running by using the command docker ps. In order to stop the the detached container you need to use the following command:
$ docker stop [CONTAINER_ID]
You can also get an overview of containers which have already been stopped by using command:
$ docker ps -a
Assigning Container Names
Up until now we’ve used the container ID to identifier and refer to a container. Also the container gets assigned a unique name which can be used to refer
$ docker run -d -p 80:80 --name mynginx01 nginx
If you now print our the list of running containers with command docker ps you can see that the container has been created with the name specified:

All the commands which we’ve used so far together with a container ID can be used with the container name as well, e.g. to stop the running container with name mynginx01 you can use the following command:
$ docker stop mynginx01
Restarting Containers
If you’d like to restart any container which is in state excited you can use the name of that container or the ID of that container together with the docker start command like you can see in the following:
$ docker start mynginx01
Running A Command In A Running Container
Now that we have a running container we need to find ways to interact with the container and the application which is running inside of the container.
First of all lets see how we can run command inside of the running container. This is done by using the docker exec command. In the following example we're using that command to start a bash terminal for our running container myngin01.
$ docker exec -it mynginx01 bash
The command prompt will then be switched to the bash shell which is running in the container and you’re able to execute further command. For example you can enter the html directory of the Nginx web server by using the following command:
# cd usr/share/nginx/html/
Inside this folder you’ll find a file index.html which contains the HTML code which is used to output the default Nginx page in the browser. To be able to see the HTML content of the file you can use the cat command:
# cat index.html
The output should then look like the following:

Sharing Data BetWeen The Docker Container And The Host
We’ve been able so explore the Docker container in the last step and see from where the HTML content is coming which is displayed in the browser when accessing the Nginx web server.
This leads to the question: how can we put our own content into the container, so that Nginx is delivering the content we’re providing. The answer to this question is: a bindmount volume needs to be used to link a directory from inside the Nginx container (usr/share/nginx/html/) to a directory on the host machine. This enables us to store HTML content which should be delivered by the Nginx web server on the host machine. Let’s see how that works:
First let’s create a new empty directory on the host machine which then should contain the HTML files:
$ mkdir html
Change into the newly created empty folder:
$ cd html
And create a new file index.html inside of that folder:
$ touch index.html
Open this file in your favourite text editor and insert the following HTML code:
This is just a very simple HTML file outputting a headline with a paragraph of text. Let’s start the Nginx container once again in the following way:
$ docker run -d -p 80:80 -v ~/Projects/docker/html:/usr/share/nginx/html --name nginx-with-custom-content nginx
When accessing the server in the browser again you should then be able to see the output which is coming from our new file index.html which is now made available within the container and served by Nginx:
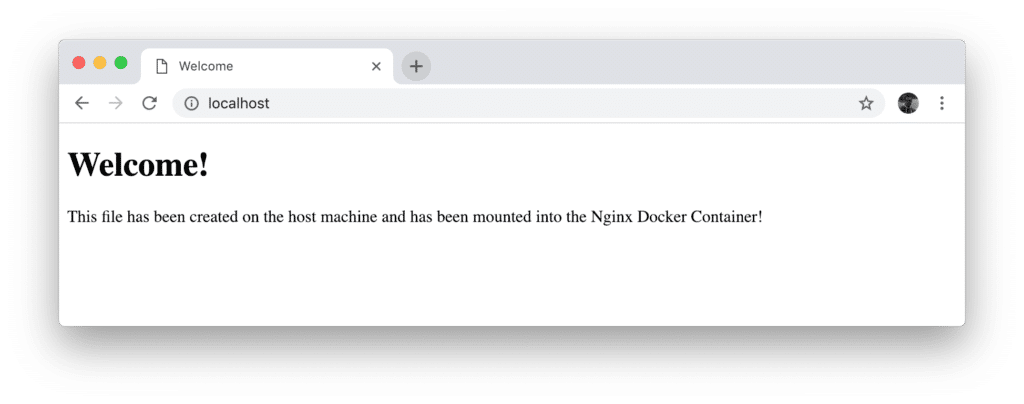
By using the option -v on the command line we’re able to specify that a host file path should be mounted on a container file path by using the following syntax:
-v [HOST_PATH]:[CONTAINER_PATH]
Let’s explore another use case which can be used to share data between host and container.
The Nginx server is creating log files. These log files are created inside the container directory /var/log/nginx. To make the content of this folder available we’re able to mount it to a host path as well:
$ docker run -d -p 80:80 -v ~/Projects/docker/html:/usr/share/nginx/html -v ~/Projects/docker/logs:/var/log/nginx --name nginx-with-custom-content nginx
The container is now running again and we should be able to see the same result in the browser when accessing port 80 on our local machine. Furthermore we’re now able to take a look inside of ~/Projects/docker/logs. Here we should be able to find at least the file access.log which is containing the log output of the Nginx server which is running in the container:

Building New Docker Images
So far we’ve been using pre-build Docker images to run our containers. Docker makes it very easy to build your own images and therewith extend or adapt existing images in many ways.
In this section we’re going to explore how custom Docker images can be build by using a Dockerfile. The following definition from the official Docker documentation summerizes what a Dockerfile is:
A Dockerfile is a text document that contains all the commands you would normally execute manually in order to build a Docker image. Docker can build images automatically by reading the instructions from a Dockerfile.
So let’s see how we can make use of a Dockerfile to create a new image (based on the official nginx image) and make sure that this new image at the same time is containing or own HTML files in the web server’s htmlfolder.
First let’s create a new file Dockerfile in the directory in which the html directory is contained:
$ touch Dockerfile
Open up the Dockerfile in your text editor and insert the following two lines:
By using the FROM command in the first line we’re declaring that the new image should be based on the nginx image.
The COPY command is used in the second line to copy the content from the html directory of the host system to the directory /usr/share/nginx/html of the container to be created.
To create the new image based on the Dockerfile you need to execute the following command inside the directory in which the Dockerfile is located:
$ docker build -t mynginx_image1 .
This command is creating a new image with name mynginx_image1:

Having created this image we’re now ready to start a new container based on this newly created image by using the docker run command once again in the following way:
$ docker run --name mynginx -p 80:80 -d mynginx_image1
Now, when accessing the Nginx web server again in the browser we’re receiving the same output as before (which is coming from our custom index.html file). This file is already stored inside this container because it has been build into our image by using the Dockerfile from above.
Share Your Image On Docker Hub
We’ve already visited hub.docker.com to search for images which we can be use to run containers. Now that we’ve managed to build our own custom image let’s see how we can use Docker Hub to upload and share our image.
First you need to create a free account on Docker Hub and make sure that you’re logged in with this account in your Docker Desktop application.
You can also use the docker command on the command line to login by using
$ docker login
Now we need to create an additional tag for our image which should be pushed to Docker Hub in the next step. The general syntax to create a new tag looks like the following:
$ docker tag [image] [username/repository:tag]
In my case I’m using the command in the following way:
$ docker tag mynginx_image1 codingthesmartway/mynginx_image1
Here I’m using my Docker Hub username codingthesmartway and I’m telling Docker to create a new tag with the name codingthesmartway/mynginx_image1.
In the last step I’m now able to use the docker push command to actually push my image to Docker Hub and make it available publicly, so that it can be used anywhere:
$ docker push codingthesmartway/mynginx
The output on the command line should look like you can see in the following screenshot:

Once complete, the results of this upload are publicly available. If you log in to Docker Hub, you can see the new image
Last updated