AWS EC2
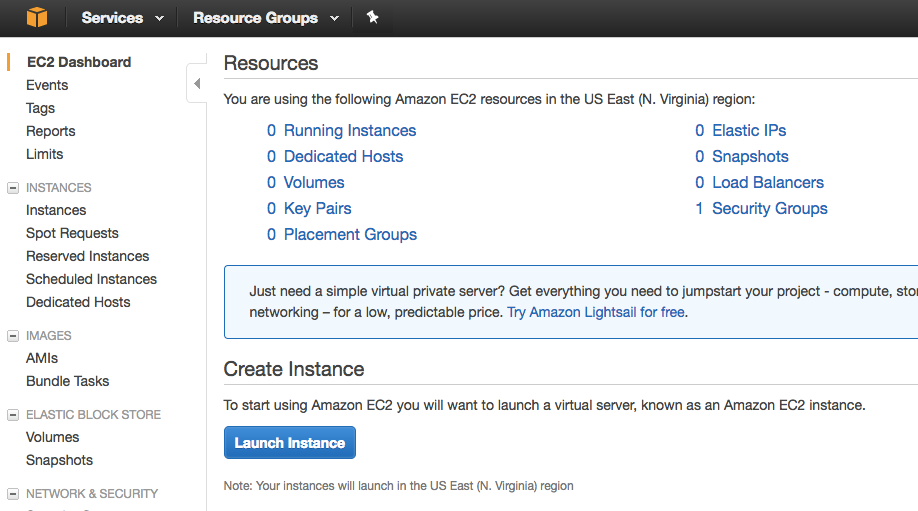
Log into the AWS console. Select EC2 and then Launch Instance:
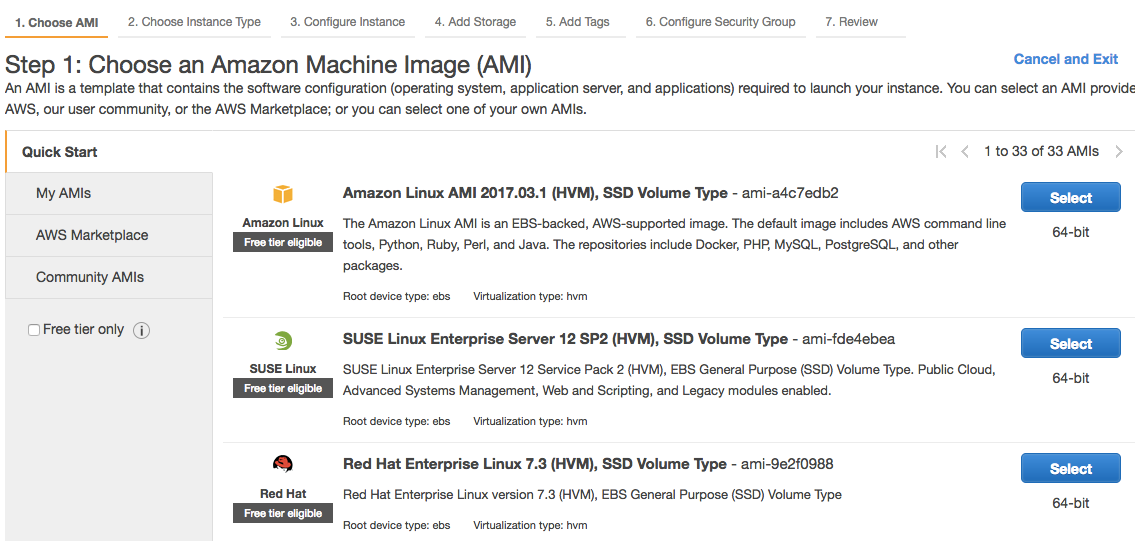
Choose the type of Operating System for our EC2 Virtual Machine
The Amazon Linux AMI comes with a whole lot of pre-built in tools including the AWS CLI, the popular programming languages and databases.
(Note: For large scale applications you may have to use Amazon’s Relational Database Service (RDS) or DynamoDB but is not necessary for this tutorial.)
Select Amazon Linux AMI:

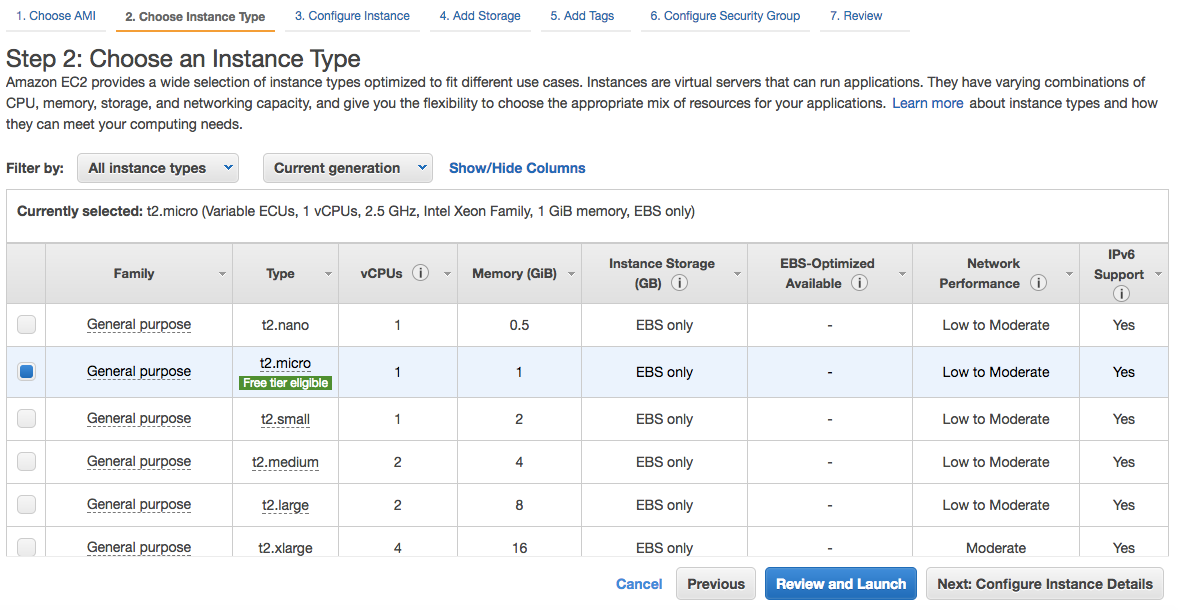
Select the type of Memory and CPU usage we want on our virtual machine
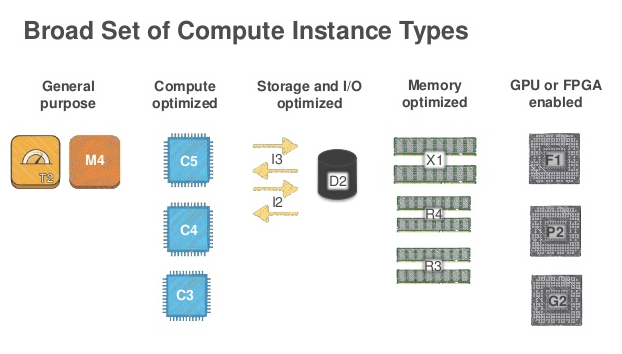
Next we’ll have to select the type of EC2 instance we want to boot up. There are ten types of EC2 instances: Dense Storage (D2), Memory Optimized (R4), General Purpose (M4), Compute Optimized (C4), Graphics Intensive (G2), High Speed Storage (I2), Field Programmable Gateway (F1), Lowest Cost General Purpose (T2), Graphics General Purpose (P2) and Memory Optimized (X1).
That is a lot of options. Below is a visual that groups these different types. We’re going to use the smallest and most general type of instance: T2 Micro.Grouping of various EC2 instance types (photo credit)
More details: Amazon EC2 Instance Types
Select T2 and then “Next: Configure Instance Details”
Configure the virtual machine and select a pricing plan
Next we’re going to configure our instance details. There are four different pricing models for EC2 instances: On Demand, Spot, Reserved and Dedicated Hosts.
Read More: Amazon EC2 Pricing
For the most part we’re going to leave the defaults:
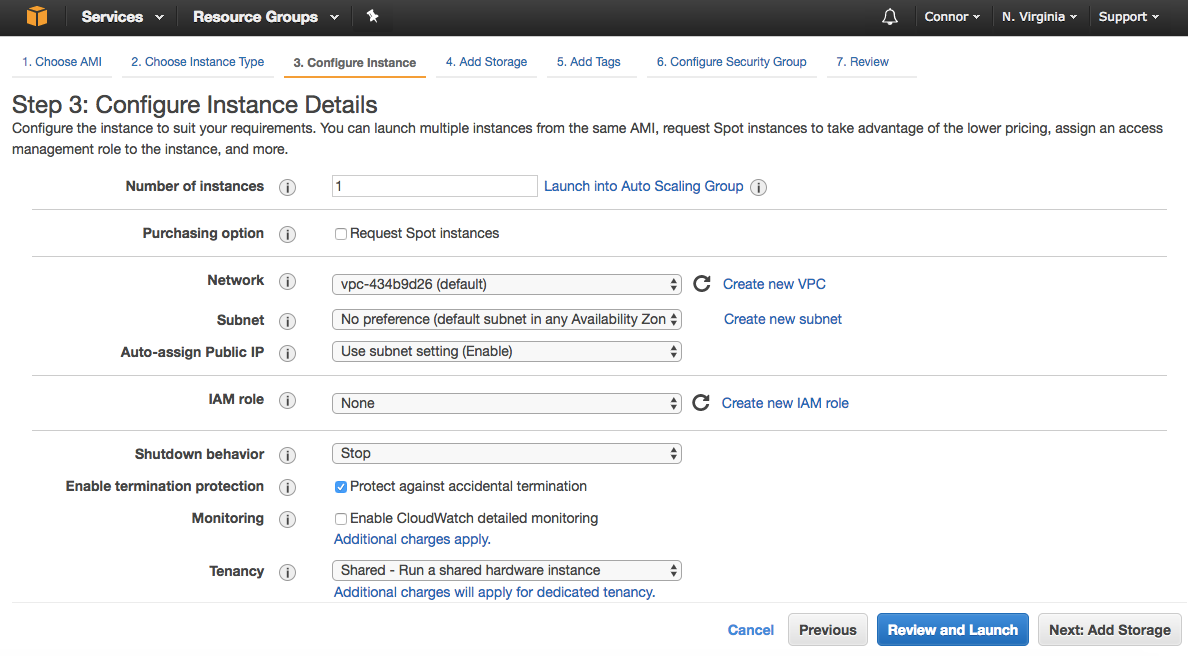
VPC stands for Virtual Private Cloud. One subnet is tied to one Availability Zone. IAM stands for Identity Access Management and is used to manage permissions. In the advanced section we can pass bootstrap shell scripts to our EC2 instances to do things like install PHP or Apache.
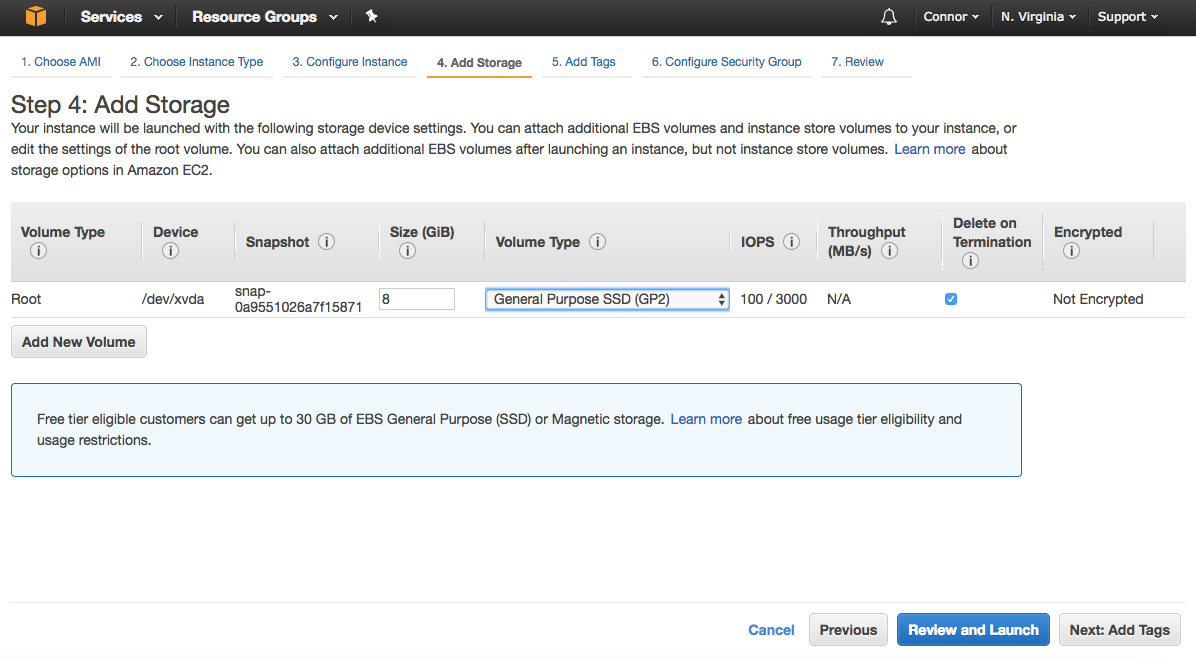
The next part relates to Elastic Beanstalk (EBS). EBS is used to create storage volumes that attach to EC2 virtual machines. With EBS we can create filesystems, run databases and other cool stuff.
There are three different storage types for root EBS volumes: General Purpose SSD (GP2), Provisioned IOPS SSD (IO1) and Magnetic HDD. SDD stands for Solid State Drive and HDD is Hard Disk Drive.
Read More: Amazon EBS Volume Types
Select storage option for Elastic Beanstalk (EBS)
EBS Volume is a virtual hard disk in the cloud. Root means it is where we are going to boot our Operating System from (such as Windows or in our case Linux).
Delete on Termination means the EBS will be deleted if we delete the EC2 instance.
Add Tags (optional for now)
Tags help you control costs. They help you see where your AWS costs are coming from. Tag everything and tag as much as possible.
Read More: Tagging Your Amazon EC2 Resources
Create a Security Group
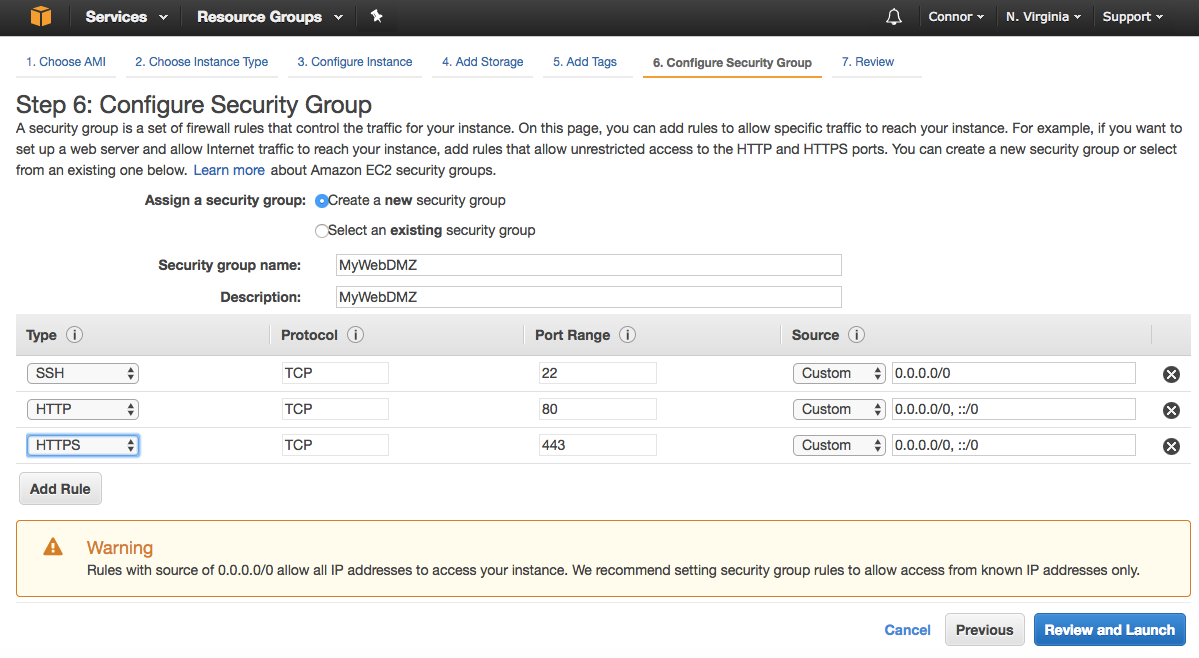
Security Groups are virtual firewalls. We are going to create a Security Group called MyWebDMZ. The Security Rules define what type of traffic we want to allow through. We want to SSH into our EC2 so we can do things like install Apache. We want to view the website so we’ll allow HTTP and HTTPS.Create a new security group. The warning is because we did not restrict the IP address source of who can SSH into our virtual machine.
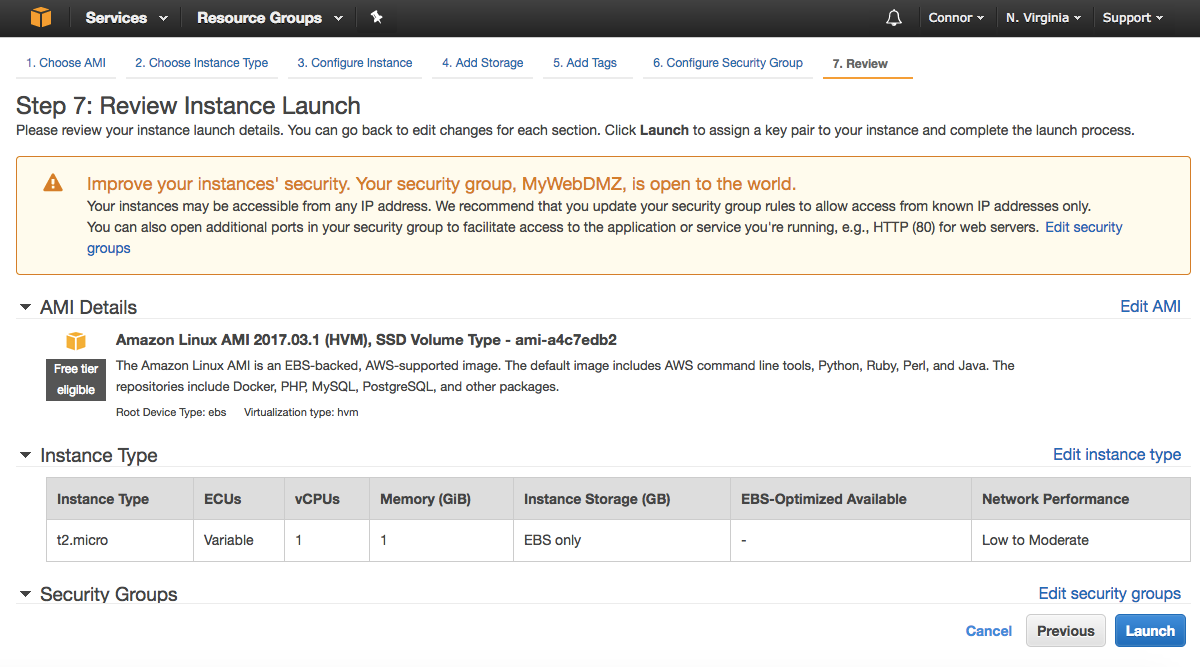
Launch the instance from the AWS dashboard
Review the instance and hit Launch.
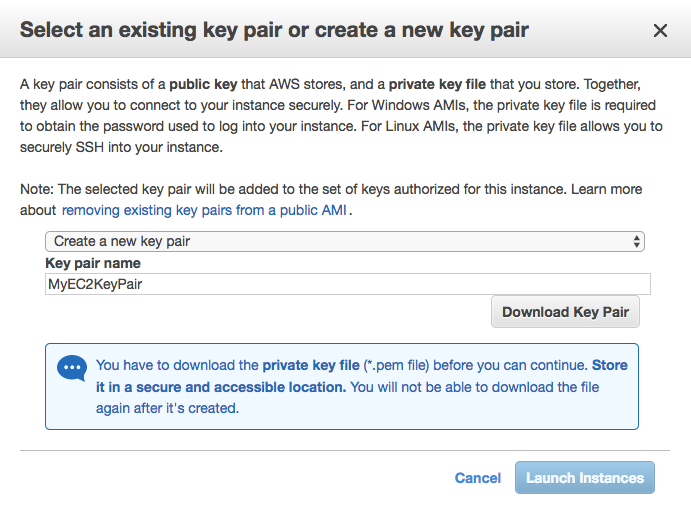
We will get a dialog where we will create a Public and Private key pair. Do not let anyone know your private key or they will be able to hack your virtual machines.First click Download Key Pair and then Launch Instances.
After the instances launch we’ll get to a landing page where you can select View Instances (bottom right corner).
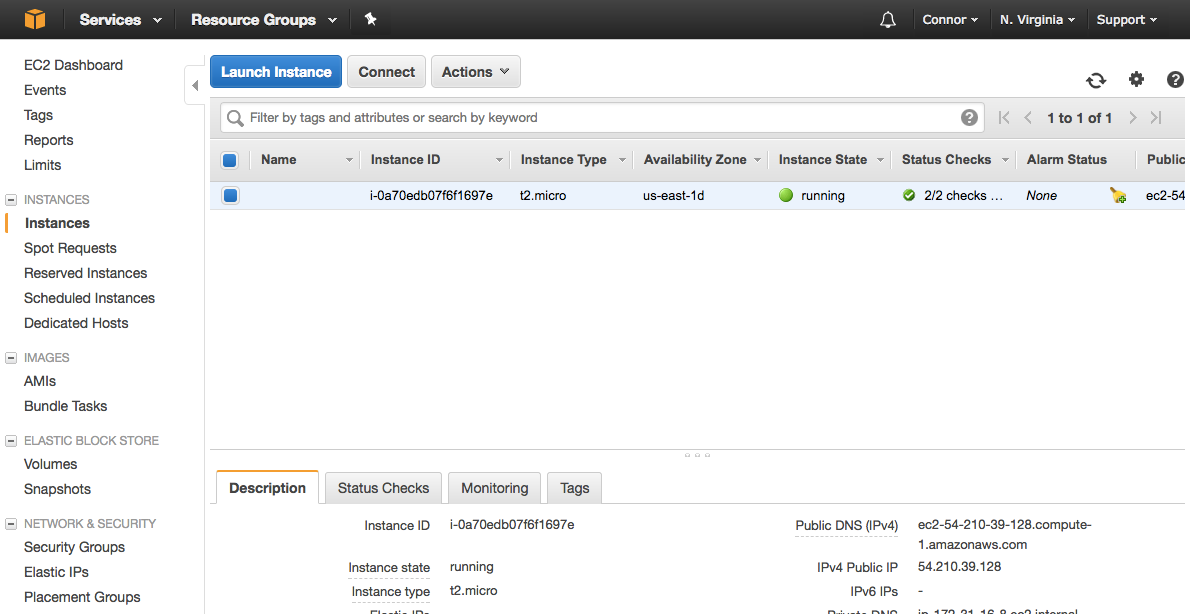
SSH into our machine to install the web server
Grab your IPv4 Public IP address from the bottom right corner in the Description section.
Create a new folder for your SSH keys and change the permissions. I downloaded my key pair to projects folder. So change into that directory and run the following commands:
Make ourselves a super user and update our operating system and install Apache (aka httpd):
Add an index.html for the internet to see
Write some HTML:
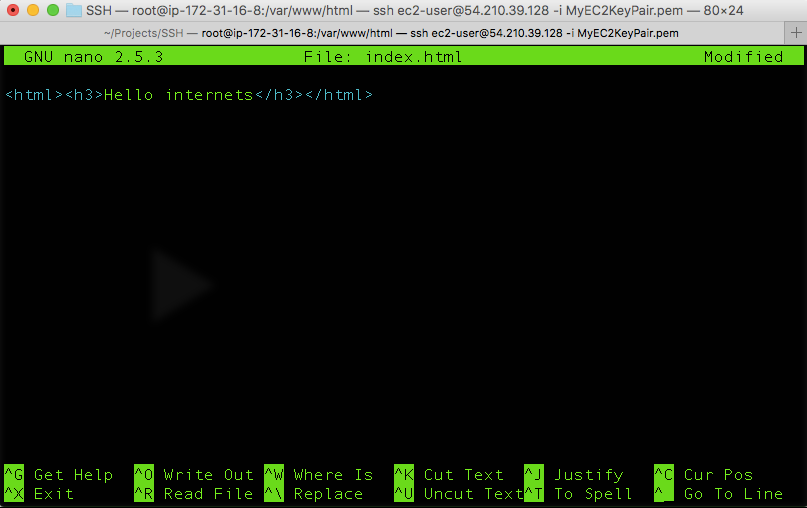
Then hit Ctrl+X and then Y that yes you want to save your changes. Then hit enter that you want to save this to index.html.
Start Apache:
Next navigate your web browser to your public IP address and you will be able to see your web page hosted on Amazon Web Services in the cloud.
In my case the web page was served on http://54.210.39.128/ (my public ip address for the virtual machine we created)
Last updated