
AWS Pipeline - Example CI/CD
Before we start, make sure to bring up an AWS EC2 instance with the following configured;
Role with access to S3(This is needed because the AWS CodeDeploy agent needs to fetch the deployment artifacts from S3)
Install CodeDeploy agent as mentioned here
Make sure to create a tag with a key/value of your choice(we will need it later on during the AWS CodeDeploy stage)
Security group with the following:

Yes, I have opened everything up to the whole world. Please do not send me death threats, just wanted to maintain brevity.
The Custom TCP rule is used so that we can test it out via PostMan at the end, as we need to open up the Ephemeral ports for the traffic to go out. More about ephemeral ports can be found here.
Now that the code is ready, the next thing to do is to set up AWS CodeBuild. On this article, I’ll focus on how to do it via the AWS Console. The next step will be to automate it all using CloudFormation because automation is key! Stay tuned for the next post!
Before we get started, we need to set up the S3 bucket, since everything is copied to S3 during the lifecycle of the pipeline in AWS. Done creating the S3 bucket? Good, let's get going.
If you look at the source code in the GitHub repository, you will see a file named buildspec.yml. This file specifies the steps needed for the build process. Let’s have a look at this file:
As AWS CodeBuild spawns the build nodes upon request, you will need to install the package that you need. CodeBuild also gives you the ability to use your own Docker image from AWS ECR or DockerHub if you want to. In which case, you would have pre-installed the packages you need. For this example, I have gone ahead with using a builder node managed by AWS CodeBuild.
The other interesting section on the buildspec is the cache . As you know, with Maven, the dependencies are downloaded if they are not present within your local repository during the maven build process. Unless you have something like Nexus or Artifactory that caches your maven dependencies, each build will try to download it from the maven repository.
With the cache functionality, what AWS does is cache whatever directory you mention which gets uploaded to S3 as part of the build process. With this, whenever a new build is spawned, AWS will re-use the cached content by which you minimise the time take for the overall build process. In this instance, I am caching the maven repository path.
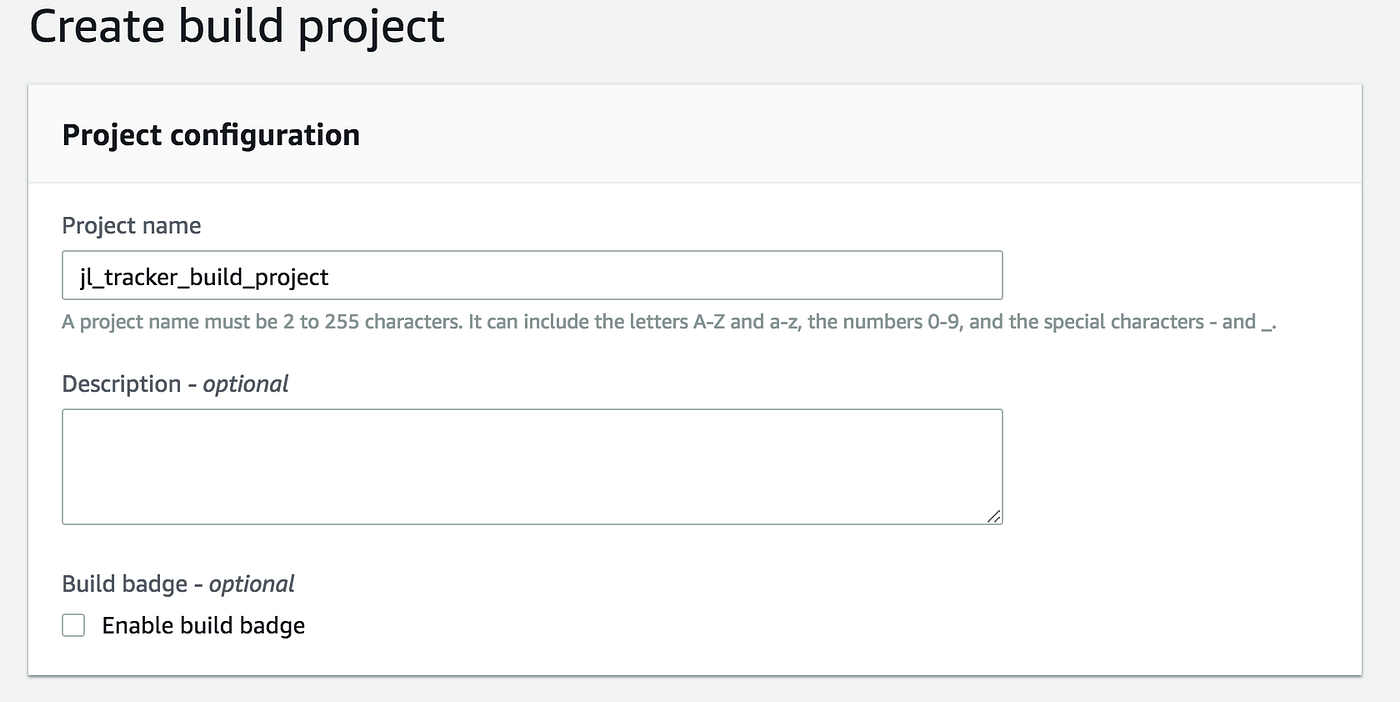
We start off with naming our build project:
Next, let’s move on to mentioning our source provider which in this case is the GitHub repository. Here’s my repository:

Next, we need to specify the image we need to run our build. In this case, I have selected an AWS CodeBuild managed instance. Note that a new service role will be created as part of this process. This role will grant S3 and CloudWatch:

Moving on, the next section is about the buildspec file we talked about before. If you have not named it the same or if it was in a different path, this is where you can customise it:

Lastly, you will configure how you want to artifact packaged. In this instance, I have configured it to be copied to S3 as a zip because AWS CodeDeploy needs it to be defined as a Zip so that it can do its deployment process. You can also specify the S3 location for copying the cached content previously explained.

That’s about it for setting up your build project. You should now see it in all its glory on your AWS CodeBuild.
We now move on to setting up AWS CodeDeploy for our deployment process. Before we do this, we have to set up a new AWS role for CodeDeploy. This role will need the AWS code deploy policy as well as read/write access to S3. Mine looks like this:![]()

Before we do, let's go back to our GitHub repository where you will find a file called appspec.yml which is the file that mentions to steps to be taken as part of the installation phase of CodeDeploy:
In our case, let’s first copy the deployment artifacts to our home directory after which we first set the correct privileges in order to execute our script files. We then have a start and stop script defined. If we look at the start script, it is defined as follows:
The first step is to set up a CodeDeploy application:

Next, we need to set up a deployment group. This is where you tell CodeDeploy the instances you need to deploy your application to. In our case, I will be using the tag I created for my EC2 instance to create the deployment group. You can however even mention an autoscaling group if you wanted to.
First, name the deployment group:

Follow that up with assigning the AWS role you created before for CodeDeploy:![]()

Next, you can select the deployment type. To keep this simple, I have kept it as In-place but as you can see we can even do blue/green deployments if needed;

In the next section, mention how CodeDeploy will find your instances. In my case, I select the tag I created before to identify by EC2 instance:

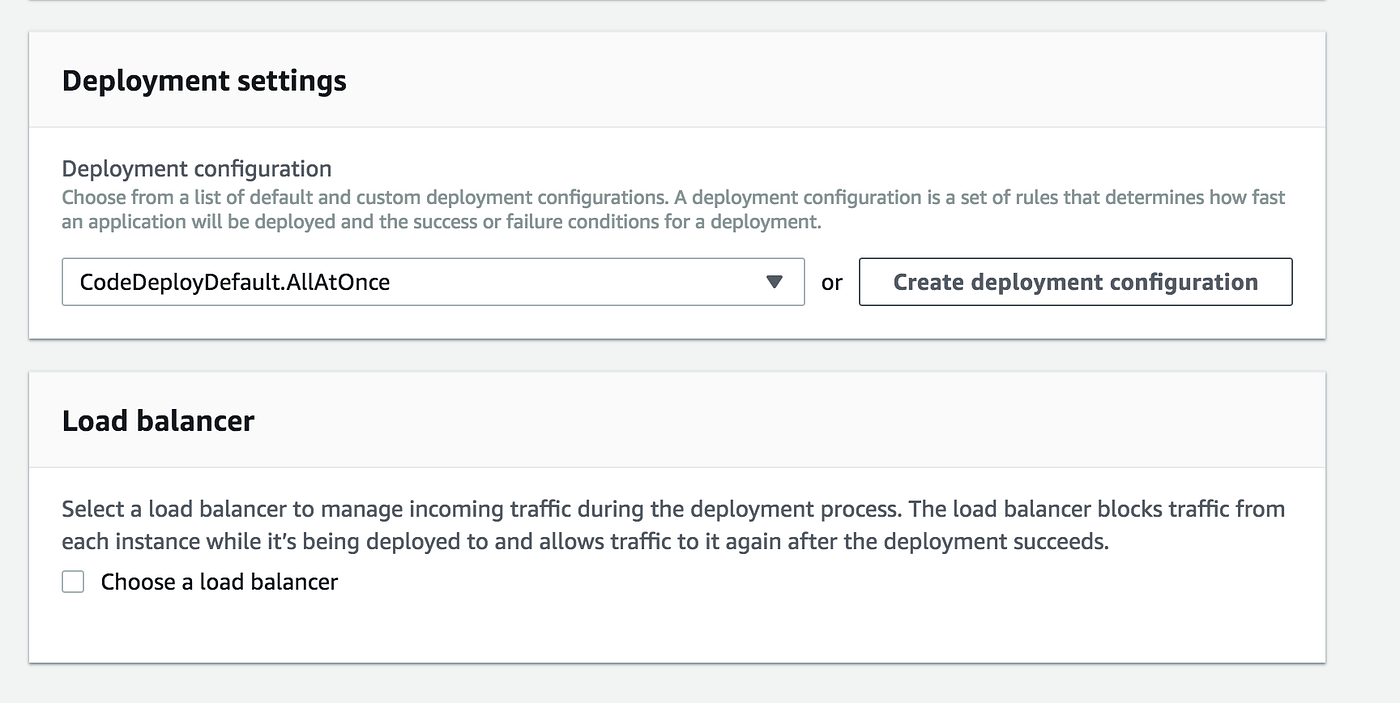
Finally, provide the deployment settings you need. In my case, I have selected them all at once. If you wanted to do a rolling update, you can do that too. As I am not using an ELB in this example, I have not ticked the load balancer:
That being done, we finally move onto creating our pipeline which will bring everything together to build and deploy our application to our lonely EC2 instance.
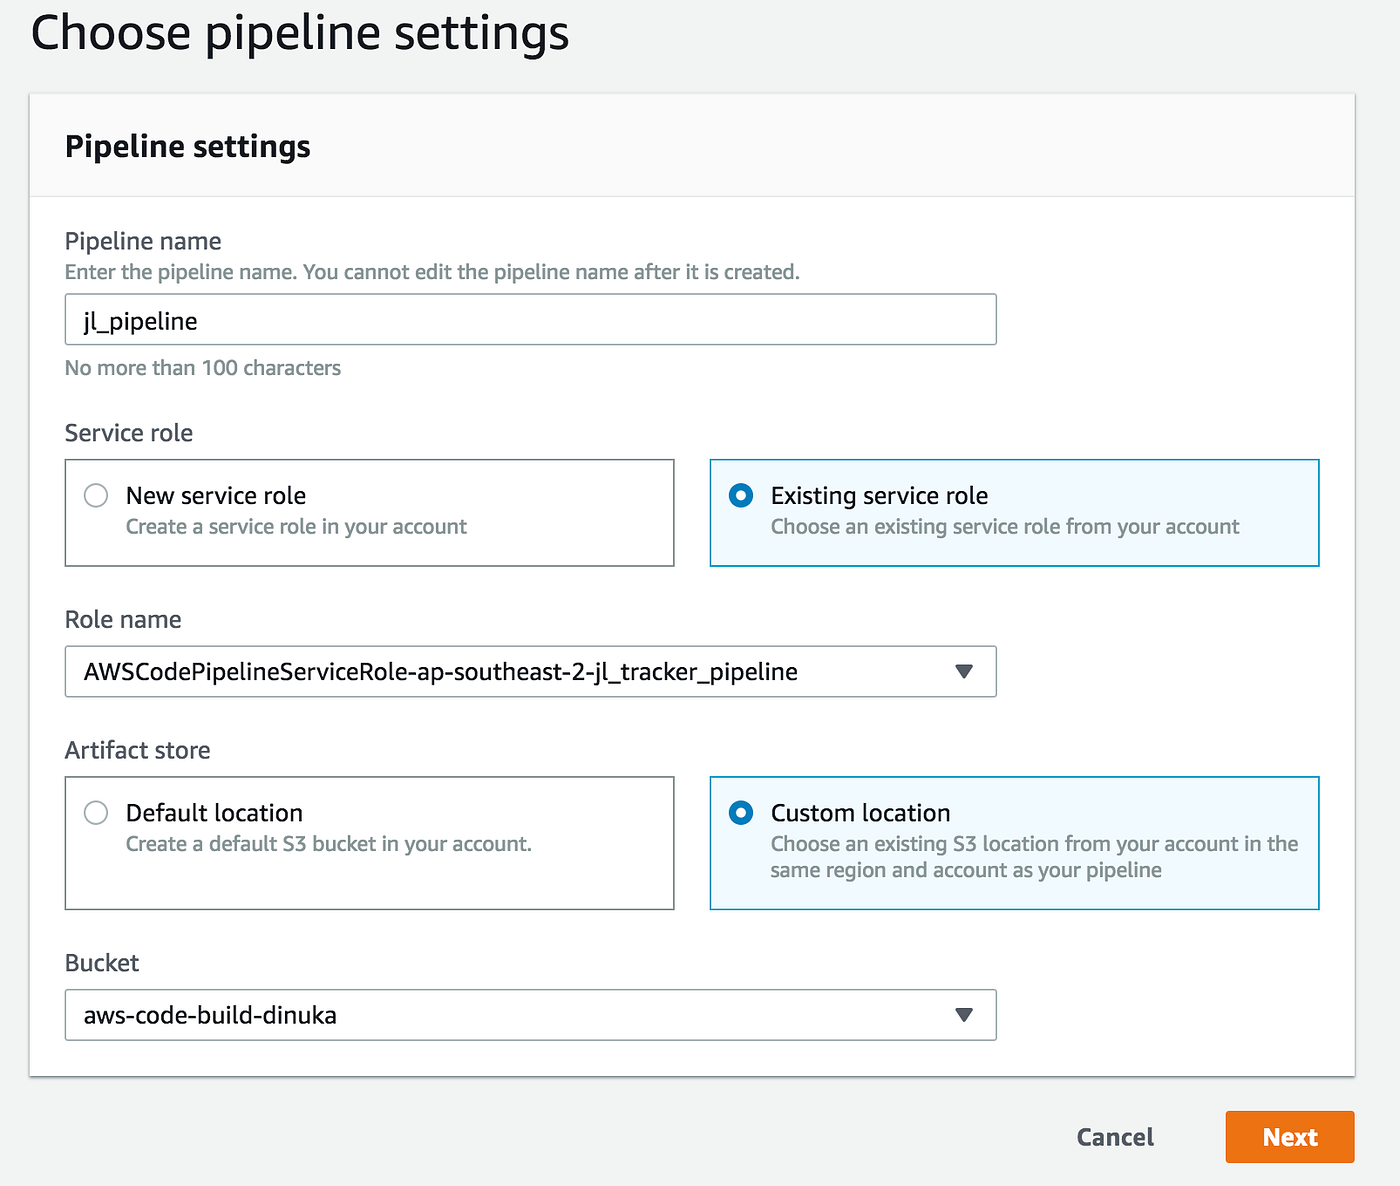
We start off with giving the pipeline a name and assigning an IAM role. In my case, I already had a defined role. You can let CodePipeline create a bucket for you, or you could use a bucket you already have which is what I have done in this instance.
Next step is to link our GitHub repository as follows. Note that I have given the privilege to create a web hook so that CodePipeline does not have to keep polling for new changes.

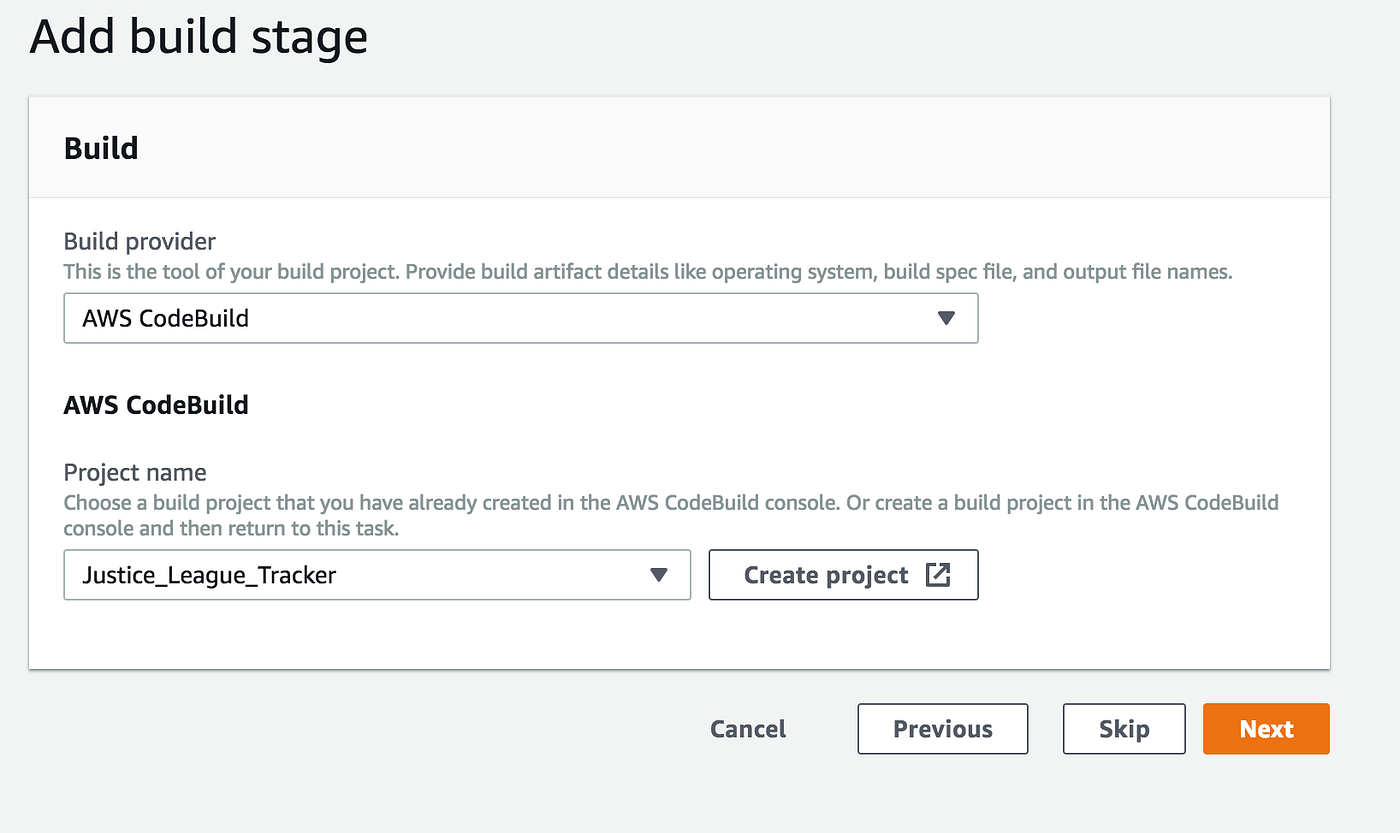
We then mention our AWS CodeBuild project, we set up as our build provider. AWS Pipeline is very flexible in that matter, you could even hook in your own build agent if needed, like Jenkins;
Time to then hook up the CodeDeploy project we setup before as follows;

That’s it! You finally can review and create your pipeline after which your build is triggered. Here is my final beautiful successfully run pipeline:

In my opinion, AWS does make it easier to set up a pipeline with a few clicks and configurations. Having worked on setting up a pipeline with Bamboo, I must say that Bamboo does provide a better way of building and maintaining your pipelines with features such as linked repositories and built-in plugins for other integrations as needed.
But the AWS tools sure do play nice with the rest of the AWS infrastructure, where you can integrate it with CloudWatch for alarms and monitor it centrally, which I believe adds more value.
Last updated